Baby Lock Altair Tutorials, embroidery

How to Embroider a Key Ring or Luggage Tag – Easy Step-by-Step Tutorial

This is the full you tube tutorial Baby Lock Altair Tutorials | How to Embroider a Key Ring or Luggage Tag https://youtu.be/VXdoxYZ8WsI

Cassie Cartmell – Faodail Creation

Table of Contents

Baby Lock Educator Cassie Cartmell

If you have ever wondered how to embroider a key ring or luggage tag, this tutorial will show you how to create one from start to finish using an embroidery machine, vinyl and a built-in embroidery design. Baby Lock Educator Cassie Cartmell will guide you through each stage, from choosing and resizing your design to adding the vinyl and finishing your project.

For this project, Baby Lock Educator Cassie Cartmell is using the Baby Lock Altair 2 and IQ Designer to transform one of the machine’s built-in embroidery designs into a completely finished key ring or luggage tag.

The fun part about this technique is that you don’t need to start with a dedicated key fob embroidery file. You can take a suitable embroidery design already inside your machine and create the shape you need around it.

I chose a guitar design for mine. It ended up being a little larger than I originally intended, so it works particularly well as a luggage tag. I also made a smaller version using another built-in design, which was approximately 2ยฝ inches by 2ยฝ inches and was a much better size for a traditional key ring.

As Baby Lock Educator Cassie Cartmell, I love showing you how to use the creative features already built into your machine to make fun and practical projects. The technique is exactly the same whether you create a smaller key ring or a larger luggage tag.

Let’s look at how to embroider a key ring or luggage tag step by step.

How to Embroider a Key Ring or Luggage Tag

How to Embroider a Key Ring or Luggage Tag

Before beginning, choose your embroidery design carefully. If you want to make a small key ring, look for a design that can be reduced considerably without compromising the embroidery.

Some embroidery designs can be resized more successfully than others.

The guitar design I chose couldn’t be made quite as small as I initially wanted. This meant my finished project was better suited to being a luggage tag rather than a small key fob.

That’s part of experimenting with the designs already available in your embroidery machine!

Supplies for How to Embroider a Key Ring or Luggage Tag

You will need:

  • Embroidery machine
  • Embroidery hoop
  • Cutaway stabilizer
  • Thin vinyl
  • Embroidery thread
  • Matching bobbin thread for the final satin stitching
  • Masking tape
  • Sharp scissors
  • Rotary cutter
  • Cutting mat
  • Chicago screws or your preferred key fob hardware
  • Suitable embroidery design

I am demonstrating how to embroider a key ring or luggage tag using the Baby Lock Altair 2, but you can adapt the basic technique depending on the features available on your embroidery machine.

The ability to create and edit shapes directly on the machine makes IQ Designer particularly useful for this project.

Step 1: Choose a Design to Embroider a Key Ring or Luggage Tag

Choose a Design to Embroider a Key Ring or Luggage Tag

The first step in how to embroider a key ring or luggage tag is choosing your design.

On my Baby Lock Altair 2, I went into the embroidery section and looked through the built-in designs.

I wanted to use the guitar, which can be found within the novelty designs.

Select your chosen design and press Set.

How to Embroider a Key Ring or Luggage Tag – Resize Your Embroidery Design

Next, go into Edit and select the resize option.

When resizing the design, I use the option that recalculates the stitches. This allows me to reduce the design considerably while the machine recalculates the embroidery stitches for the new size.

I reduced my guitar as far as the machine would allow.

The smallest size was still approximately seven inches by two inches. That is larger than I would normally choose for a key ring, but I decided to continue with it.

This is an important thing to consider when learning how to embroider a key ring or luggage tag.

Not every embroidery design will reduce to the ideal key ring size.

What Size Should an Embroidered Key Ring Be? – How to Embroider a Key Ring or Luggage Tag

There isn’t one required size, but think about how the finished project will be used.

A smaller design is generally more practical for everyday keys, while a larger design can make a fun luggage tag or bag tag.

I made another version using a different built-in design that finished at approximately 2ยฝ inches by 2ยฝ inches. That was a much more practical size for a set of keys.

Step 2: Create a Stamp Around the Embroidery Design – How to Embroider a Key Ring or Luggage Tag

Create a Stamp Around the Embroidery Design - How to Embroider a Key Ring or Luggage Tag

The next step in how to embroider a key ring or luggage tag is creating the shape that will eventually become the outside of the project.

Position the embroidery design where you want it on your screen.

Next, create a stamp of the design.

I made my stamp slightly wider than the original guitar. You need some additional space around the embroidery because this becomes part of the shape surrounding your finished design.

I set mine approximately 0.10 inches away from the embroidery.

Once you are happy with the stamp, save it into the machine’s memory.

This saved outline can now be brought into IQ Designer.

Step 3: How to Embroider a Key Ring or Luggage Tag – Open the Design in IQ Designer

How to Embroider a Key Ring or Luggage Tag - Open the Design in IQ Designer

Now we can use IQ Designer to continue creating our key ring or luggage tag.

Open IQ Designer on the Baby Lock Altair 2.

Select the shape/stamp option and locate the stamp you created in the previous step.

When you bring it onto the screen, you should see the outline of your original embroidery design. In my case, I can see the guitar shape.

This outline gives us a guide for creating the outer portion of the project.

How to Embroider a Key Ring or Luggage Tag – Add a Rectangle for the Key Ring Strap

Next, add a rectangle.

This rectangle will eventually create the tab or strap where the key ring hardware will be attached.

Resize the rectangle until it is approximately the width you want for your strap. I brought mine down to approximately one inch wide and then adjusted its length.

Position the rectangle so that it overlaps the top of your main design.

When learning how to embroider a key ring or luggage tag, this overlap is important because we want the tab and main shape to become one continuous design.

Step 4: How to Embroider a Key Ring or Luggage Tag – Erase the Unwanted Lines

How to Embroider a Key Ring or Luggage Tag - Erase the Unwanted Lines

Zoom into your design so you can clearly see where the rectangle and the main design overlap.

I like to enlarge the image considerably for this part because it makes it much easier to see exactly what needs to be removed.

Select the eraser tool.

I prefer using the square eraser for this.

Carefully erase any unwanted portions outside the shape of the guitar so that your rectangle and guitar create the outline you need.

Take your time.

The cleaner you make the outline in IQ Designer, the easier the next stages of how to embroider a key ring or luggage tag will be.

Check the Key Ring Shape – How to Embroider a Key Ring or Luggage Tag

Zoom back out and look at the complete shape.

Make sure:

  • The tab connects to the main design.
  • There are no unwanted lines.
  • The outline follows the embroidery design.
  • There is enough space around the embroidery.
  • The tab is wide enough for your chosen hardware.

Once you’re happy with it, you’re ready to create the first stitching line.

Step 5: How to Embroider a Key Ring or Luggage Tag – Create and Save the Running Stitch

How to Embroider a Key Ring or Luggage Tag - Create and Save the Running Stitch

The running stitch is an important part of how to embroider a key ring or luggage tag because it gives us our initial placement and stitching line.

Change the outline you created to a straight stitch.

I changed the colour on screen to blue so that it was easy for me to identify.

Select the fill bucket and apply the change to the entire outline.

Save this version into your machine’s memory.

I always like to save my work as I go rather than risk losing the design after spending time creating it.

Go to Next, preview your design and save it into the embroidery machine’s memory.

Why Save Your Embroidery Design as You Work?

Creating a custom design involves several stages.

Saving each important stage gives you a backup and makes it easier to return to the design if you accidentally exit a screen or need to make changes.

I often leave IQ Designer after saving and then bring the design back in again just to make sure everything has saved correctly.

Step 6: How to Embroider a Key Ring or Luggage Tag Create the Satin Stitch Outline

How to Embroider a Key Ring or Luggage Tag Create the Satin Stitch Outline

Now we need another version of the outline.

This time, change the outline to a satin stitch.

I left this version red on the screen so I could easily distinguish it from my running stitch.

Use the fill bucket again to apply the satin stitch to the complete outline.

Before saving, I like to adjust the satin stitch so that it is slightly wider.

This final satin stitching will create the beautiful finished edge around your key ring or luggage tag.

Save the satin stitch version.

Go to Next, preview it and save it into the embroidery section of your machine.

At this point, you should have the elements needed to assemble the final embroidery design.

Step 7: How to Embroider a Key Ring or Luggage Tag Assemble the Key Ring or Luggage Tag Design

How to Embroider a Key Ring or Luggage Tag Assemble the Key Ring or Luggage Tag Design

Now return to the main embroidery screen.

The next stage of how to embroider a key ring or luggage tag is assembling all the different pieces in the correct order.

First, bring in the running stitch outline you created and press Set.

Select Add and bring in your original embroidery design.

For me, this means returning to the novelty designs, selecting the guitar and pressing Set.

Resize the guitar again so that it fits correctly within the outline you created.

You can use the fine adjustment controls to make small changes until everything lines up properly.

Press OK when you are satisfied.

Add the Satin Stitch

Select Add again.

This time, open the satin stitch outline you previously saved and press Set.

The satin stitch should sit over your design and create the final outside edge.

You can now change the thread colours for the embroidery design.

I chose a combination of black and red for my guitar, but this is where you can personalize your project.

Choose colours that coordinate with your vinyl or create something completely different.

That’s one of the best parts about learning how to embroider a key ring or luggage tag you can use the same basic technique to create many different versions.

Step 8: How to Embroider a Key Ring or Luggage Tag Hoop the Stabilizer and Stitch the Design

How to Embroider a Key Ring or Luggage Tag Hoop the Stabilizer and Stitch the Design

Now we’re ready to start stitching.

Hoop a piece of cutaway stabilizer in your embroidery hoop.

Start by stitching the running stitch outline.

Once the placement line has stitched, position a piece of thin vinyl over the outlined area.

I like using relatively thin vinyl for this type of project because we will eventually have layers of vinyl, stabilizer and satin stitching.

Make sure the vinyl completely covers the placement area.

How to Embroider a Key Ring or Luggage Tag Stitch the Embroidery Design

Return the hoop to the machine.

If the machine has automatically moved forward to the next part of the design and you need to repeat the running stitch, use your stitch navigation controls to return to it.

Run the running stitch over the vinyl.

Once the vinyl is secure, continue stitching the different components of your embroidery design.

For my version, I stitched all the individual sections of the guitar.

Take your time and follow the colour changes shown by your machine.

Watching the original embroidery design become part of your custom key ring is where this project really starts coming together.

Step 9: How to Embroider a Key Ring or Luggage Tag Add Vinyl to the Back and Stitch the Satin Edge

How to Embroider a Key Ring or Luggage Tag Add Vinyl to the Back and Stitch the Satin Edge

Before stitching the final satin edge, we need to finish the back.

Take another piece of vinyl and place it on the reverse side of the hoop.

The vinyl should completely cover the design.

Secure it using masking tape so that it cannot shift when you return the hoop to the embroidery machine.

How to Embroider a Key Ring or Luggage Tag – Match Your Top and Bobbin Thread

This is particularly important when learning how to embroider a key ring or luggage tag.

For the final satin stitching, use the same colour thread in the bobbin as you have in the top thread.

Why?

Because the back of the key ring or luggage tag will be visible.

If you use a completely different bobbin colour, you’ll see it around the back of the finished project.

Using matching top and bobbin thread gives the front and back a much cleaner appearance.

Return the hoop to your embroidery machine and stitch the final satin outline.

The machine will stitch all the way around your custom shape, joining the layers together and creating the finished edge.

Step 10: Trim and Finish Your Embroidered Key Ring or Luggage Tag

Trim and Finish Your Embroidered Key Ring or Luggage Tag

Once the satin stitching is complete, remove the hoop from the embroidery machine.

Take the project completely out of the hoop.

I first use my rotary cutter to remove some of the larger pieces of excess material.

Then switch to a pair of sharp scissors for the detailed trimming.

Carefully cut around the entire design.

You want to cut close to the satin stitches without cutting into them.

Do not rush this step.

Careful trimming makes a big difference to the final appearance of your embroidered key ring or luggage tag.

Add the Key Ring Hardware – How to Embroider a Key Ring or Luggage Tag

Once everything is trimmed, fold the tab in half.

Make a hole through the tab where you want your hardware to sit.

For this project, I used Chicago screws.

I like using Chicago screws because one side simply screws into the other. This means I don’t need to use a rivet press to secure the tab.

Insert the Chicago screw through your hole and screw the two pieces together.

Your project is finished!

How to Embroider a Key Ring or Luggage Tag in Different Sizes

Once you understand how to embroider a key ring or luggage tag, you can use this same method with many different embroidery designs.

The main thing to consider is size.

My guitar design came out larger than I initially wanted. Because of that, I think it works better as a luggage tag than a traditional key fob.

That’s perfectly fine.

Rather than abandoning the project, think about another way the finished design can be used.

I created another version using a different design already available on the Baby Lock Altair 2. That design could be reduced to approximately 2ยฝ inches by 2ยฝ inches, which made it an excellent size for a set of keys.

Choosing Designs for Embroidered Key Rings – How to Embroider a Key Ring or Luggage Tag

When choosing a design, consider its finished proportions as well as its appearance.

Look for a design that:

  • Can be resized successfully.
  • Has a recognizable outer shape.
  • Isn’t overly complicated at a small size.
  • Gives you room to add a tab.
  • Works well with the width of your vinyl.
  • Can be trimmed without cutting into important embroidery.

You don’t have to use a guitar.

Once you know how to embroider a key ring or luggage tag, try experimenting with the designs already built into your embroidery machine.

Why Use Vinyl for an Embroidered Key Ring or Luggage Tag?

Why Use Vinyl for an Embroidered Key Ring or Luggage Tag

Vinyl works particularly well for this project because it doesn’t fray when you cut around the finished satin stitching.

It also gives the finished key ring structure without requiring lots of additional finishing.

I prefer using a thinner vinyl for this technique.

Remember that the embroidery machine will eventually be stitching through the front vinyl, stabilizer and backing vinyl.

A bulky material can make the final satin stitching more difficult.

Can You Personalize an Embroidered Luggage Tag? – How to Embroider a Key Ring or Luggage Tag

Absolutely.

The technique in this tutorial gives you a starting point for creating your own designs.

Once you’re comfortable with how to embroider a key ring or luggage tag, you can experiment with different embroidery designs, vinyl colours, thread combinations, shapes and sizes.

You could also explore adding initials or other personalization using the lettering features available on your embroidery machine.

How to Embroider a Key Ring or Luggage Tag Successfully

The most important part of this project is taking your time while creating the outline.

Check your design carefully before stitching.

Make sure your placement line, embroidery design and satin outline are properly aligned on the embroidery screen.

Save your work at each major stage.

And when you’re trimming the finished project, don’t rush. Cutting into your satin stitching can damage the finished edge.

My Top Tip for Making an Embroidered Key Ring

Test different built-in embroidery designs.

One design might not reduce enough for a small key ring, while another may be perfect.

That’s exactly what happened with my guitar.

It was larger than I wanted, but the technique still worked beautifully. Instead of a small key fob, I ended up with something much better suited to a luggage tag.

The smaller design I tested was much more suitable for everyday keys.

How to Embroider a Key Ring or Luggage Tag: Final Thoughts

How to Embroider a Key Ring or Luggage Tag

Now you know how to embroider a key ring or luggage tag using an embroidery design, IQ Designer, vinyl and your embroidery machine.

This is a fun way to take the designs already available inside your machine and use them in a completely different way.

The guitar may have turned out a little bigger than I originally planned, but that’s part of creating and experimenting. The finished design works really well as a luggage tag, while my smaller version makes a great key ring.

Once you’ve created the running stitch and satin stitch outlines, you can start experimenting with other designs and see what you can turn into your next key ring or luggage tag.

I hope you enjoyed this tutorial and that it inspires you to explore more of the designs and creative tools already available on your embroidery machine.

If you try this project, let me know what design you choose for your key ring or luggage tag!

Read this next : How to Embroider a New Yearโ€™s Day Wall Hanging โ€“ An Easy & Beautiful Machine Embroidery Project https://faodailcreation.ca/2026/09/28/how-to-embroider-a-new-years-day-wall-hanging/

Baby Lock Altair Tutorials, embroidery

How to Embroider a New Yearโ€™s Day Wall Hanging – Baby Lock Altair Tutorials

This is the link to the full you tube tutorial – Baby Lock Altair Tutorials | How to Embroider a New Yearโ€™s Day Wall Hanging https://youtu.be/bDqR0f_RCeQ

Cassie Cartmell – Faodail Creation

Table of Contents

Learning how to embroider a New Yearโ€™s Day wall hanging is a fun way to create a little handmade decoration to celebrate the start of a brand-new year. This machine embroidery project combines embroidered lettering, decorative motifs, and a simple canvas finishing technique to create something you can display in your home.

For this How to Embroider a New Yearโ€™s Day Wall Hanging, I am using my Baby Lock Altair 2 embroidery machine and creating the entire embroidery design directly on the machine. As a Baby Lock Educator Cassie Cartmell, I enjoy sharing practical embroidery tutorials that show you how to use your machineโ€™s features while creating something creative and useful.

For this project, I chose the words โ€œCheers to the New Yearโ€ and combined two different fonts with a decorative Art Deco-style motif. Creating the design directly on the machine gives you the opportunity to experiment with built-in fonts, lettering sizes, placement, and decorative designs. As a Baby Lock Educator Cassie Cartmell, I especially enjoy showing how these features can be used to create personalized projects rather than simply using a pre-made embroidery design.

Once the embroidery is finished, the fabric is wrapped around an inexpensive 12-inch square artistโ€™s canvas. This simple finishing technique turns the embroidered fabric into a lightweight wall hanging that can easily be displayed as part of your New Yearโ€™s decorations.

I also added some hot-fix crystals at the end to give the finished New Yearโ€™s Day wall hanging a little extra sparkle. If you enjoy adding your own creative touches to embroidery projects, this is a great opportunity to experiment with embellishments and make your design unique.

Whether you are new to machine embroidery or looking for a fun way to use the features on your Baby Lock Altair 2, this project is a great way to get creative. As Baby Lock Educator Cassie Cartmell, I love encouraging sewists and embroiderers to explore their machines and discover just how much they can create.

Supplies – How to Embroider a New Yearโ€™s Day Wall Hanging

Supplies - How to Embroider a New Yearโ€™s Day Wall Hanging

Before you begin your New Yearโ€™s Day wall hanging, gather all your supplies.

You will need:

I found my 12 x 12-inch canvas inexpensively at the dollar store. You don’t need an expensive artist’s canvas for this project because most of the canvas will eventually be covered by your embroidered fabric.

Choosing Fabric – How to Embroider a New Yearโ€™s Day Wall Hanging

Choosing Fabric - How to Embroider a New Yearโ€™s Day Wall Hanging

I cut my main fabric to 16 x 16 inches.

Although the canvas itself is only 12 x 12 inches, you need additional fabric around each side so that you have enough to wrap around the edges of the canvas.

The extra fabric also gives you something substantial to hold while pulling the fabric taut and stapling it to the back.

Cutting the fabric too close to the finished size of the canvas can make the final stage much more difficult.

I also cut a 16 x 16-inch piece of batting.

Why Add Batting Behind the Fabric?

I highly recommend using batting underneath your embroidered fabric.

If you place only a single layer of fabric over the artist’s canvas, the fabric may not sit as smoothly or look as substantial.

Batting adds a little padding between the fabric and the canvas. It gives the finished New Yearโ€™s Day wall hanging a softer appearance and helps the fabric sit nicely against the canvas.

It can also make the finished project look more like a piece of textile art rather than simply fabric stretched over a frame.

How to Embroider a New Yearโ€™s Day Wall Hanging Step by Step

Now that the supplies are ready, let’s work through how to embroider a New Yearโ€™s Day wall hanging from preparing the fabric to adding the final sparkling embellishments.

For my wall hanging, I used the largest hoop for my Baby Lock Altair 2, which measures approximately 9 1/2 x 14 inches.

Using a large hoop gives me plenty of room to create the lettering and decorative elements for the centre of the project.

Step 1: Cut the Fabric and Batting – How to Embroider a New Yearโ€™s Day Wall Hanging

Cut the Fabric and Batting - How to Embroider a New Yearโ€™s Day Wall Hanging

Start your New Yearโ€™s Day wall hanging by cutting both your main fabric and batting to 16 x 16 inches.

The finished canvas measures 12 x 12 inches, so this gives you approximately two additional inches on each side.

Don’t be tempted to trim the fabric to the exact size of the canvas.

You will need that extra fabric later when wrapping the embroidered piece around the canvas and securing everything at the back.

Place the batting aside for now. We won’t need it until we are ready to assemble the finished wall hanging.

Check Your Fabric Before Embroidering – How to Embroider a New Yearโ€™s Day Wall Hanging

Take a moment to make sure the fabric is smooth before you begin.

If necessary, press the fabric so that you don’t have deep creases running through the embroidery area.

A smooth piece of fabric makes it much easier to find the centre accurately and hoop everything correctly.

Step 2: Find the Centre of the Fabric – How to Embroider a New Yearโ€™s Day Wall Hanging

Find the Centre of the Fabric - How to Embroider a New Yearโ€™s Day Wall Hanging

Finding the centre of your fabric is important because it helps position the embroidery design in the middle of your New Yearโ€™s Day wall hanging.

Fold the fabric in half and lightly crease the centre.

Then fold it in half again in the opposite direction.

When you open the fabric, the two creases will intersect at the centre point.

This gives you a quick reference for positioning the fabric in your embroidery hoop.

Mark the Centre Point – How to Embroider a New Yearโ€™s Day Wall Hanging

I also like to use a Frixion pen to mark the centre.

Frixion pens are useful for projects like this because the marks can disappear when heat is applied.

Draw a small mark or short central guideline where the folds meet.

You now have an easy visual reference when positioning the fabric in your hoop.

Test Your Marking Pen First

Whenever you use a removable marking pen on fabric, test it on a scrap of the same fabric first.

You want to make sure you are happy with how the marking behaves before using it on the front of your New Yearโ€™s Day wall hanging.

Step 3: Hoop the Fabric and Stabilizer – How to Embroider a New Yearโ€™s Day Wall Hanging

Hoop the Fabric and Stabilizer - How to Embroider a New Yearโ€™s Day Wall Hanging

Next, prepare the fabric for machine embroidery.

I am using tear-away stabilizer for this project.

Place the stabilizer with the fabric and position both layers in your embroidery hoop according to the requirements of your machine and stabilizer.

Make sure the centre mark you created is positioned correctly within the embroidery area.

The fabric should be smooth and secure without wrinkles or loose areas.

Why Stabilizer Is Important – How to Embroider a New Yearโ€™s Day Wall Hanging

Stabilizer supports your fabric while the embroidery machine forms thousands of stitches.

Without suitable stabilization, the fabric can move, distort or pucker as the design is embroidered.

Because lettering needs to remain clean and readable, good stabilization is particularly important for this New Yearโ€™s Day wall hanging.

Once everything is securely hooped, attach the hoop to your embroidery machine.

Step 4: Choose the First Embroidery Font – How to Embroider a New Yearโ€™s Day Wall Hanging

Choose the First Embroidery Font - How to Embroider a New Yearโ€™s Day Wall Hanging

Now comes the really fun part: creating the embroidered message.

On my Baby Lock Altair 2, I start by opening the lettering or font section.

The machine gives me a variety of built-in fonts to choose from, so there are plenty of opportunities to customize the New Yearโ€™s Day wall hanging.

For my first line, I am embroidering the word:

Cheers

I selected my first font and entered the capital C.

I then changed the remaining letters to lowercase and continued spelling the word.

Adjust the Letter Size

The Baby Lock Altair 2 allows you to choose different lettering sizes.

For the word โ€œCheers,โ€ I selected a medium size.

Choose a size that works comfortably within your embroidery field and leaves enough room for the additional lines and decorative motifs.

If you accidentally enter the wrong letter, don’t worry.

You can go back, delete the incorrect letter and replace it before continuing.

Take your time when creating the wording. It is much easier to correct spelling on the screen than after it has been embroidered!

Step 5: Add the Second Line of Text – How to Embroider a New Yearโ€™s Day Wall Hanging

Add the Second Line of Text - How to Embroider a New Yearโ€™s Day Wall Hanging

Once the word โ€œCheersโ€ is ready, set the lettering and select Add so you can create another line.

For the second section, I chose a different built-in font.

I particularly like this font because it is narrower, which creates a nice contrast against the first line of text.

I then added the words:

TO THE NEW YEAR

Using different fonts adds more visual interest to the New Yearโ€™s Day wall hanging and helps create a design that looks intentionally arranged rather than simply typed onto the fabric.

Experiment With Your Lettering – How to Embroider a New Yearโ€™s Day Wall Hanging

Don’t be afraid to move the lettering around.

You can change the size and position of the words until you are happy with the overall composition.

This is one of the advantages of creating the design directly on an embroidery machine with editing capabilities.

You can experiment before committing to the final stitch-out.

Step 6: Arrange and Resize the Lettering – How to Embroider a New Yearโ€™s Day Wall Hanging

Arrange and Resize the Lettering - How to Embroider a New Yearโ€™s Day Wall Hanging

With the wording entered, start arranging the elements on the embroidery screen.

Move each section until the design looks balanced.

You may want โ€œCheersโ€ to be the dominant part of your New Yearโ€™s Day wall hanging, with โ€œTo the New Yearโ€ acting as a smaller secondary line.

Try increasing or decreasing the size of the lettering until the proportions look right.

Keep the Canvas Size in Mind – How to Embroider a New Yearโ€™s Day Wall Hanging

Remember that although your fabric is 16 x 16 inches, the visible front of the finished canvas will only be approximately 12 x 12 inches.

Your embroidery therefore needs to fit comfortably inside that finished area.

Don’t position important lettering too close to the edge.

Leaving some space around the embroidery will make the finished New Yearโ€™s Day wall hanging look much more balanced once the fabric is wrapped around the canvas.

Step 7: Add a Decorative Embroidery Motif – How to Embroider a New Yearโ€™s Day Wall Hanging

Add a Decorative Embroidery Motif - How to Embroider a New Yearโ€™s Day Wall Hanging

The lettering looked a little plain by itself, so I decided to add a decorative motif.

I went back into the design section of the Baby Lock Altair 2 and selected a decorative design with an almost Art Deco-inspired appearance.

This works beautifully with the celebratory New Year theme.

After selecting the motif, press Set and move it into position.

Resize and Rotate the Motif How to Embroider a New Yearโ€™s Day Wall Hanging

I wanted the decorative element to line up nicely with the wording, so I resized and rotated it until it worked with the rest of the design.

On the Altair 2, there is also a stitch recalculation option that can allow additional resizing of certain designs.

When I selected this option, I was able to enlarge the motif a little more than I could initially.

Continue adjusting your decorative elements until the whole New Yearโ€™s Day wall hanging design feels balanced.

Preview Before You Embroider

Before moving on, look carefully at the entire design on the machine screen.

Check:

  • Spelling
  • Letter placement
  • Design size
  • Motif position
  • Rotation
  • Overall balance

This final check can save you from discovering a mistake after the embroidery has already started.

Step 8: Embroider the New Yearโ€™s Day Wall Hanging

Embroider the New Yearโ€™s Day Wall Hanging

Once you are happy with your layout, move into embroidery mode.

Your New Yearโ€™s Day wall hanging is now ready to stitch.

Follow your embroidery machine’s instructions for threading, bobbin setup and attaching the embroidery hoop.

Start the embroidery and allow the machine to stitch the lettering and decorative motifs.

Keep an eye on the project while the machine is working.

Once the entire embroidery design has finished, remove the hoop from the machine.

Remove the Stabilizer

Take the embroidered fabric out of the hoop carefully.

Turn the project over and begin removing the excess tear-away stabilizer from the back.

Work carefully around the embroidery rather than pulling aggressively against the stitches.

Remove enough excess stabilizer to give you a neat finish while avoiding unnecessary stress on the embroidered areas.

Your embroidered fabric is now ready to become a wall hanging.

Step 9: Wrap the Embroidery Around the Canvas – How to Embroider a New Yearโ€™s Day Wall Hanging

 Wrap the Embroidery Around the Canvas - How to Embroider a New Yearโ€™s Day Wall Hanging

Place your 12 x 12-inch canvas on your work surface.

Layer the batting and embroidered fabric over the front of the canvas, making sure the embroidery is facing outward.

Before stapling anything, spend a little time getting the design centred.

Look at the New Yearโ€™s Day wall hanging from the front and check that the lettering appears level and evenly positioned.

Start With Opposite Sides

Once you are happy with the placement, begin securing the fabric to the back of the canvas.

I use a large stapler for this.

Start with two opposite sides.

For example, secure the top and then the bottom, or start with the left and then the right.

Pull the fabric taut, but don’t pull so hard that you distort the embroidered design.

Add a few staples to hold those sides securely.

Then move to the remaining two sides.

Continue alternating and checking the front as you work.

Keep Checking the Front

Don’t staple the entire back without checking your work.

Turn the New Yearโ€™s Day wall hanging over periodically and make sure the design is still centred.

If something has shifted, it is much easier to correct it before you have added all the staples.

Work around the canvas until the fabric and batting are smooth and securely attached.

Take particular care when folding the corners so they look neat from the sides of the canvas.

Step 10: Add Hot-Fix Crystals for Extra Sparkle – How to Embroider a New Yearโ€™s Day Wall Hanging

Add Hot-Fix Crystals for Extra Sparkle - How to Embroider a New Yearโ€™s Day Wall Hanging

At this stage, your New Yearโ€™s Day wall hanging could be considered finished.

But mine was absolutely calling out for a little sparkle!

I decided to add some hot-fix crystals to the front.

The crystals catch the light and give the finished wall hanging a lovely twinkle, which works perfectly with the New Year theme.

Place the crystals where they complement the embroidery rather than covering or competing with the lettering.

Follow the manufacturer’s instructions for applying your particular hot-fix crystals.

Keep the Embellishments Simple

You don’t need to cover the entire project with crystals.

A few carefully placed embellishments can be enough to transform the finished New Yearโ€™s Day wall hanging.

The embroidery should still be the main feature.

The crystals simply add that final celebratory detail.

Ideas for Customizing Your New Yearโ€™s Day Wall Hanging

One of my favourite things about this project is how easy it is to customize.

You don’t have to create exactly the same design as mine.

Change the words, fonts, embroidery thread or decorative motifs to create a New Yearโ€™s Day wall hanging that matches your own decorating style.

You could embroider the year onto the fabric or personalize the wall hanging with a family name.

You could also experiment with metallic-looking embroidery threads, different fabric backgrounds or other decorative embellishments.

Try Different Embroidery Fonts

Combining two fonts can give a simple embroidered message much more personality.

Try pairing a decorative font with something narrower and simpler.

The contrast helps establish a visual hierarchy and makes the main word or phrase stand out.

For this project, โ€œCheersโ€ is the focal point, while โ€œTo the New Yearโ€ supports the main message.

Change the Canvas Size – How to Embroider a New Yearโ€™s Day Wall Hanging

You can also adapt this tutorial to different canvas sizes.

Just remember to leave enough additional fabric around the canvas to wrap comfortably around the sides and onto the back.

The embroidery field of your machine will also determine how large you can make your design.

Make a Coordinating Set

Instead of making only one New Yearโ€™s Day wall hanging, you could create several smaller canvases with coordinating embroidery.

For example, one could feature lettering, another could have decorative motifs and another could feature the year.

Displayed together, they could create a fun piece of handmade New Year decor.

Tips for a Professional-Looking New Yearโ€™s Day Wall Hanging

The most important thing is to plan your design before you start embroidering.

Check your spelling carefully and make sure the complete design fits within the visible area of the finished canvas.

Always consider how the embroidery will look once the fabric is wrapped around the sides.

The extra 16 x 16-inch fabric gives you plenty of material to work with when covering a 12 x 12-inch canvas.

Batting also makes a noticeable difference.

Adding batting underneath the embroidered fabric gives the finished New Yearโ€™s Day wall hanging more body and helps create a smooth, padded appearance.

Finally, take your time when stapling.

The embroidery may be beautifully stitched, but if the fabric is crooked on the canvas, the finished project won’t look quite right.

Secure opposite sides gradually and keep turning the canvas over to check the positioning.

How to Embroider a New Yearโ€™s Day Wall Hanging – Final Thoughts

How to Embroider a New Yearโ€™s Day Wall Hanging

Now you know how to embroider a New Yearโ€™s Day wall hanging using built-in embroidery machine fonts, decorative motifs and a simple artist’s canvas.

I love how this project turned out.

The embroidered โ€œCheers to the New Yearโ€ message gives it a festive feel, while the decorative embroidery adds interest without making the design too busy.

And those little hot-fix crystals add just the right amount of sparkle!

Creating the design directly on the Baby Lock Altair 2 also means there is plenty of room to experiment. You can change the fonts, move the lettering, resize the individual elements and add decorative embroidery until you have a design you love.

Once you have finished embroidering, turning the fabric into a New Yearโ€™s Day wall hanging is surprisingly straightforward. A little batting, an inexpensive artist’s canvas and a staple gun are all you need to transform your embroidery into a finished piece of textile art.

Best of all, you can use the same technique for much more than New Year’s decorations.

Once you know how to embroider fabric and wrap it around a canvas, you can use the technique for seasonal wall hangings, personalized gifts, holiday decorations and other machine embroidery projects throughout the year.

Have fun experimenting with your embroidery machine and creating your own New Yearโ€™s Day wall hanging!

Read this next : Baby Lock Altair 2 In the Hoop Christmas Placemat : Easy Holiday Embroidery Tutorial https://faodailcreation.ca/2026/07/22/baby-lock-altair-2-in-the-hoop-christmas-placemat/

Baby Lock Altair Tutorials, embroidery

How to Embroider an Ornament Using IQ Designer | Baby Lock Altair Tutorials

This is the full you tube tutorial link Baby Lock Altair Tutorials | How to Embroider an Ornament https://youtu.be/dIE0CLXDf1I

Cassie Cartmell – Faodail Creation

How to Embroider an Ornament Using IQ Designer - A Fun Christmas Tutorial

Learning How to Embroider an Ornament is a fun way to create personalized Christmas decorations for your tree. In this tutorial, Iโ€™m going to show you How to Embroider an Ornament using IQ Designer on a Baby Lock embroidery machine. As a Baby Lock Educator Cassie Cartmell, Iโ€™ll walk you through creating the ornament design directly in IQ Designer, adding a personalized name, stitching the design, and finishing the ornament so it is ready to hang on your Christmas tree.

This project is also a great way to use your embroidery machine to make personalized Christmas gifts. As Baby Lock Educator Cassie Cartmell, I love showing how simple embroidery techniques can be turned into meaningful handmade gifts. You can add a family memberโ€™s name, a favorite word such as โ€œJoyโ€ or โ€œChristmas,โ€ or personalize ornaments around a particular theme.

For my ornament, Iโ€™m creating an Oilers-themed Christmas tree and adding player names to the center. However, you can easily adapt the same technique for your own Christmas tree, favorite team, family, or holiday theme. Baby Lock Educator Cassie Cartmell demonstrates how you can use IQ Designer to create a personalized design directly on your embroidery machine rather than relying only on pre-made designs.

Whether you are new to IQ Designer or looking for a creative Christmas embroidery project, this ornament is a fun way to experiment with lettering, decorative elements, and personalization. Baby Lock Educator Cassie Cartmell encourages you to take the basic idea and make it your own, creating a one-of-a-kind ornament that can become a special part of your holiday decorations for years to come.

How to Embroider an Ornament – What Youโ€™ll Need

How to Embroider an Ornament: What Youโ€™ll Need

Before learning How to Embroider an Ornament, gather everything you need so you can work through the project without stopping.

Supplies for How to Embroider an Ornament

  • Baby Lock embroidery machine with IQ Designer
  • 4 x 4 embroidery hoop
  • Three pieces of cotton fabric
  • Embroidery thread
  • Matching bobbin thread
  • Approximately 5 inches of ribbon
  • Masking tape
  • Iron
  • Pinking shears or fabric scissors
  • Hot-fix crystal setter and crystals, optional
  • Stabilizer appropriate for your fabric and embroidery project

I use the same color thread in the bobbin as I use on top. This gives the finished ornament a neat appearance from both sides.

How to Embroider an Ornament in IQ Designer

The first part of learning How to Embroider an Ornament is creating the embroidery design. IQ Designer gives you a lot of flexibility because you can create the basic ornament shape, add a decorative fill, and personalize the center with lettering.

Step 1: Create the Ornament Design in IQ Designer – How to Embroider an Ornament

Create the Ornament Design in IQ Designer - How to Embroider an Ornament

Open IQ Designer on your Baby Lock embroidery machine and begin by creating a circle.

  1. Select the shape option.
  2. Choose a circle and press OK.
  3. Resize the circle to approximately 3 inches. I used a size of about 330.
  4. Use the zoom function if necessary so you can see your design clearly.
  5. Select the fill option and choose a decorative fill.
  6. Press inside the circle to apply the fill.
  7. Adjust the size of the fill design until you like the appearance.

If you wanted to make a simple embroidered ornament without a name, you could stop with a decorative filled circle and use the same construction technique to finish it.

For my personalized ornament, however, I want to create an open area in the middle for the name.

Step 2: Add and Customize the Name – How to Embroider an Ornament

Add and Customize the Name - How to Embroider an Ornament

Clear the previous design and bring the circle back into IQ Designer.

  1. Resize the circle to approximately 330.
  2. Press Next and select the running stitch.
  3. Add your lettering using the Add function.
  4. Choose the font you want to use.
  5. Enter your name or word.
  6. Adjust the lettering size so it fits inside the ornament.
  7. Use the lettering arrangement options to curve or tilt the name.
  8. Preview the design and make any necessary adjustments.

You can use a person’s name, initials, โ€œJoy,โ€ โ€œChristmas,โ€ or any other word you would like.

For my Oilers-themed Christmas ornaments, I’m using player names. The same idea would work beautifully for a family Christmas tree.

Step 3: Create the Open Area for the Lettering – How to Embroider an Ornament

Create the Open Area for the Lettering - How to Embroider an Ornament

Once your lettering is positioned correctly, create a stamp from the lettering.

  1. Select the stamp function.
  2. Adjust the distance between the stamped elements.
  3. Press Memory and save the design.
  4. Return to IQ Designer.
  5. Open the original circle.
  6. Bring the saved design back into the project.
  7. Add the decorative fill again.

The saved design creates an area where the decorative fill will not stitch, leaving space for your lettering.

You can adjust the size of the decorative fill until the individual shapes look the way you want them to.

Take some time to preview the design. If you see stitching that you don’t want, remove or turn it off before moving forward.

Step 4: Save the Complete Embroidery Design – How to Embroider an Ornament

Once you are happy with your design, save it into the embroidery side of the machine.

  1. Preview the complete design.
  2. Press Memory to save it.
  3. Press Set to move the design into the embroidery section.
  4. Add your lettering if it needs to be added separately.
  5. Check that the lettering is the correct size and position.
  6. Preview the complete design one more time.
  7. Save the final design to memory.

Saving your work throughout this process is important. If you leave the IQ Designer screen without saving your design, you may not be able to retrieve the elements you need later.

How to Embroider an Ornament: Prepare the Fabric

Now that the digital design is complete, it’s time to prepare the fabric.

Step 5: Prepare the Fabric, Ribbon and Hoop – How to Embroider an Ornament

Prepare the Fabric, Ribbon and Hoop - How to Embroider an Ornament

For this project, I use a 4 x 4 embroidery hoop and three pieces of cotton fabric.

One piece will be the front of the ornament, while the other two pieces will cover the back.

Prepare the two backing pieces by folding the edges over to create a hem. You can stitch these hems if you prefer, but I simply pressed mine into place.

Next, prepare the ribbon.

  1. Cut approximately 5 inches of ribbon.
  2. Fold the ribbon in half to create a hanging loop.
  3. Place the loop toward the inside of the ornament.
  4. Use masking tape to hold the ribbon in position.

I use the same color bobbin thread as my top thread for this project.

Step 6: Stitch the Placement and Tack-Down Stitches – How to Embroider an Ornament

Place your hoop into the embroidery machine and begin stitching the design.

The machine will first stitch the placement circle. This shows you exactly where the fabric needs to be positioned.

  1. Stitch the placement line.
  2. Float your main fabric piece over the placement stitching.
  3. Make sure the fabric completely covers the placement outline.
  4. Stitch the tack-down line.

The tack-down secures the fabric to the hoop so it remains in position while the decorative embroidery is stitched.

This is one of the most useful parts of the process because the placement stitch gives you a clear guide for positioning your fabric.

How to Embroider an Ornament: Stitch the Design

Step 7: Stitch the Decorative Fill and Name – How to Embroider an Ornament

Stitch the Decorative Fill and Name - How to Embroider an Ornament

Once your fabric is secured, continue with the embroidery design.

If you have extra tack-down stitches in your design, don’t worry. You can use the plus and minus controls on the embroidery screen to move backward or forward through the design.

This allows you to skip sections that you don’t need.

When you reach the decorative fill:

  1. Change to your chosen fill thread color.
  2. Stitch the decorative background.
  3. Change thread color for the lettering.
  4. Stitch the name in the center.

For my ornament, I use white for the name.

Watch the embroidery as it stitches so you can make sure everything is positioned correctly.

How to Embroider an Ornament: Add the Backing

Once the front of the ornament has been embroidered, it’s time to add the back.

Step 8: Position and Secure the Back Fabric – How to Embroider an Ornament

With the hoop still attached to the machine, position your two hemmed pieces of fabric over the back of the ornament.

  1. Place the first piece approximately halfway down from the top.
  2. Place the second piece so it overlaps the first.
  3. Make sure the fabric completely covers the back of the ornament.
  4. Place the ribbon loop inside the ornament.
  5. Secure the fabric and ribbon with masking tape.

Make sure both sides are securely taped.

It’s particularly important to tape across the overlap in the backing fabric. If this area is loose, the embroidery foot can get underneath the fabric while the final stitching is being sewn.

Take a moment to check everything before putting the hoop back into the embroidery machine.

How to Embroider an Ornament: Stitch the Final Edge

Step 9: Stitch the Final Tack-Down – How to Embroider an Ornament

Stitch the Final Tack-Down - How to Embroider an Ornament

Place the hoop back into the embroidery machine and run the final tack-down stitch.

If necessary, change your thread color before stitching.

For my ornament, I change the thread to orange so it coordinates with the fabric.

Once the final stitching is complete, remove the masking tape. The tape should come away easily.

Then remove the ornament from the hoop.

How to Embroider an Ornament: Finish and Embellish

Step 10: Cut, Turn and Finish the Ornament – How to Embroider an Ornament

The final step in learning How to Embroider an Ornament is finishing the ornament.

  1. Carefully cut around the outside of the embroidered ornament.
  2. Use pinking shears if you want a decorative edge.
  3. Turn the ornament right side out through the opening.
  4. Gently push out the edges.
  5. Press the ornament with an iron.
  6. Add crystals if you want extra sparkle.

I like to use a hot-fix crystal setter to add crystals to my finished Christmas ornaments. They give the ornament a little extra sparkle and can really elevate the finished project.

Always follow the manufacturer’s instructions when using a hot-fix crystal setter.

How to Embroider an Ornament: Helpful Tips

Save Your IQ Designer Designs

When working in IQ Designer, save your designs to the machine memory before leaving a screen.

This is particularly important when you create a stamp or another design element that you will need to bring back into IQ Designer later.

Preview Before Stitching – How to Embroider an Ornament

Always preview the entire embroidery design before stitching.

Check for:

  • Incorrect lettering
  • Incorrect capitalization
  • Extra stitching
  • Unwanted outlines
  • Fill designs that are too large
  • Fill designs that are too small
  • Lettering that is too large
  • Incorrect placement

Taking a few moments to check your design can save you from discovering a problem after the embroidery has already started.

Personalize Your Christmas Ornaments – How to Embroider an Ornament

Once you understand How to Embroider an Ornament, you can make so many different versions.

Try adding:

  • Family names
  • Children’s names
  • Pet names
  • Initials
  • Christmas words
  • Dates
  • Monograms
  • Sports team themes

You could even create a personalized ornament for each member of your family.

How to Embroider an Ornament for Christmas

How to Embroider an Ornament

Making personalized Christmas ornaments with IQ Designer is a great way to combine embroidery and sewing into one fun Christmas project.

The beauty of learning How to Embroider an Ornament is that you can customize almost every part of the design. Change the fill pattern, thread colors, lettering, fabric, ribbon, and embellishments to create an ornament that matches your Christmas tree.

For this project, I created an Oilers-themed ornament with a player name in the center, but you can use exactly the same technique for almost any Christmas theme.

Once you have created your basic ornament design in IQ Designer, you can save it and use it again to make an entire collection of personalized ornaments.

Final Thoughts on How to Embroider an Ornament

I hope this tutorial has shown you just how much you can do with IQ Designer when creating personalized Christmas decorations.

From creating the circle and decorative fill to adding lettering, stitching the design, adding the backing, and finishing the ornament, this project gives you plenty of opportunities to customize your Christmas decorations.

If you’re looking for a fun embroidery project for Christmas, How to Embroider an Ornament is a great project to try. It uses a small 4 x 4 hoop and can be personalized in so many different ways.

And once your ornament is finished, all that’s left to do is hang it on the Christmas tree!

Don’t forget to leave a comment on the YouTube video and subscribe to the Faodail Creation channel so you don’t miss future sewing, quilting, and embroidery tutorials.

Read this next – Baby Lock Altair 2 In the Hoop Christmas Placemat : Easy Holiday Embroidery Tutorial https://faodailcreation.ca/2026/07/22/baby-lock-altair-2-in-the-hoop-christmas-placemat/

Baby Lock Altair Tutorials, embroidery

How to Embroider Fabric Labels – A Fun and Easy Sewing Project

This is the full you tube tutorial Baby Lock Altair Tutorials | How to Embroider Fabric Labels https://youtu.be/OVKSxDg-zcw

Cassie Cartmell – Faodail Creation

Table of Contents

How to Embroider Fabric Labels is a fun way to add a personalized touch to jars, baskets, sewing room storage, and handmade projects. In this tutorial, Baby Lock Educator Cassie Cartmell will show you how to create a cute embroidered fabric label for a jar that I use to store my pens.

Using the IQ Designer function on the Baby Lock Altair 2, you can create your own label design directly on the embroidery machine. You can choose a shape, add decorative stitches, include lettering, and create buttonholes so the finished label can be attached with ribbon. As Baby Lock Educator Cassie Cartmell, I love sharing practical projects that help you explore the creative possibilities of IQ Designer. This is also a great way to embroider reusable labels that can be moved between different storage containers and projects.

This is a simple project, but it is also a great way to experiment with the different design features available in IQ Designer. If you enjoy making personalized sewing projects, learning how to embroider reusable labels is a useful technique you can use again and again. Baby Lock Educator Cassie Cartmell will guide you through the process so you can confidently create your own customized labels.

Whether you are new to machine embroidery or simply looking for a quick project for your sewing room, this How to Embroider Fabric Labels tutorial is a great one to try. Youโ€™ll also learn how to embroider reusable labels that can add a practical and decorative touch to your sewing room organization. Baby Lock Educator Cassie Cartmell hopes this project inspires you to use IQ Designer to create personalized labels for all kinds of handmade projects.

How to Embroider Fabric Labels Using IQ Designer

How to Embroider Fabric Labels Using IQ Designer

The first part of this project is creating the label design in IQ Designer.

For my label, I wanted something small enough to fit neatly on the front of my jar. I also wanted to include the word PENS, but you could personalise yours with almost any word you like.

You could make labels for:

  • Pens
  • Scissors
  • Thread
  • Ribbons
  • Buttons
  • Sewing clips
  • Fabric
  • Craft supplies
  • Kitchen storage
  • Children’s toys
  • Baskets and boxes

The possibilities are almost endless.

What You Will Need – How to Embroider Fabric Labels

Before starting this How to Embroider Fabric Labels project, gather everything you need.

Below I have included my Amazon Affiliate Links, if you decide to purchase from one of these links I may receive a small commission at no extra cost to you

This is my Amazon Store Link https://www.amazon.com/shop/faodailcreation

Materials

You can choose coordinating fabrics and threads to match your sewing room or the item you are labelling.

Step 1: Choose a Shape for Your Fabric Label – How to Embroider Fabric Labels

Choose a Shape for Your Fabric Label - How to Embroider Fabric Labels

To begin How to Embroider Fabric Labels, go into IQ Designer on your embroidery machine.

I started by looking through the available shapes to find one that would work for my jar.

There are lots of different shapes available, so take some time to look through them. You don’t have to use the same shape that I used. Choose something that suits the project you are making.

I selected a shape from the second set of options and pressed OK.

The shape appeared on the design screen.

Resize the Shape

I didn’t want my label to be too large, so the next thing I did was resize it.

Bring the shape in so that it is a suitable size for your project. I adjusted the size until it was approximately the size I wanted.

For my label, I used approximately 3 for the bottom measurement.

Once the shape was the correct size, press OK.

Step 2: Create the First Stitch – How to Embroider Fabric Labels

Create the First Stitch - How to Embroider Fabric Labels

The next step in this How to Embroider Fabric Labels project is to turn the shape into a stitch.

I changed the shape to a running stitch.

You can also change the thread colour at this stage. I chose a colour that would work with the rest of my label.

After changing the stitch and colour, press OK.

This creates the first part of your embroidered label.

Press Next and save the design into IQ Designer.

I then previewed the design before saving it into the embroidery section of the machine.

Taking a moment to preview each part of your design is useful because you can check the size and placement before you begin stitching.

Step 3: Add a Decorative Fill – How to Embroider Fabric Labels

Add a Decorative Fill - How to Embroider Fabric Labels

Next, I went back into IQ Designer to add some decoration inside the shape.

This is where you can have some fun with your How to Embroider Fabric Labels project.

I selected a fill pattern from the available options.

There are several decorative fill designs to choose from, so experiment with different options to see what you like.

Once I selected my fill, I changed the thread colour and pressed inside the shape to apply the fill.

Adjust the Size of the Fill – How to Embroider Fabric Labels

The fill was initially too large for my label, so I reduced the size.

I changed the size to approximately 50%.

I then turned off the other design element temporarily and pressed Set.

Save the design into IQ Designer and preview it.

The decorative fill should now sit nicely inside your label.

Once you are happy with it, press Memory to save it into the embroidery section.

Step 4: Add a Satin Stitch – How to Embroider Fabric Labels

Add a Satin Stitch - How to Embroider Fabric Labels

The next element I wanted to create was a satin stitch.

Bring the shape back onto the screen and select the satin stitch option.

The design was already set to a satin stitch, so I simply changed the thread colour so that I could clearly see it.

Press inside the line until the area is selected.

Then press Next.

Adjust the Satin Stitch Density

For this part of How to Embroider Fabric Labels, you can adjust the density of the satin stitch.

Change the density to suit your fabric and the look you want.

Once you are happy with the settings, press Set.

Save the design into IQ Designer and preview it.

Then press Memory to save the design into the embroidery section of the machine.

Now you have the main decorative elements ready to build your label.

Step 5: Build the Fabric Label – How to Embroider Fabric Labels

Build the Fabric Label - How to Embroider Fabric Labels

Now we can start putting all of the pieces together.

This is the part of How to Embroider Fabric Labels where the individual design elements become a complete project.

I started by adding a placement stitch.

Press Set after adding the placement stitch.

Next, add the tack-down stitch.

I used the same shape for the tack-down stitch and then changed the thread colour so that I could easily identify the different steps.

Press Set.

Step 6: Add the Fabric Fill – How to Embroider Fabric Labels

Next, add the fill stitch to the design.

Select the fill and press Set.

This will create the main fabric area of your label.

At this stage, you can preview your design to make sure everything is positioned correctly.

Step 7: Add the Lettering – How to Embroider Fabric Labels

Add the Lettering - How to Embroider Fabric Labels

Now it’s time to personalise your label.

For my jar, I wanted the label to say:

PENS

Add the lettering using the lettering function on your embroidery machine.

Type the word you want to use and press Set.

You can use any word that suits your project.

For example, if you are making a label for a sewing basket, you could use:

  • THREAD
  • FABRIC
  • BUTTONS
  • RIBBON
  • SCISSORS
  • CLIPS

Resize the Lettering

The lettering initially appeared too large, so I reduced the size.

Resize the lettering until it fits comfortably inside the label.

Make sure there is enough space around the word so that it remains easy to read after embroidery.

Once you are happy with the size, press OK.

Step 8: Add Another Running Stitch – How to Embroider Fabric Labels

Next, I added another running stitch to the design.

Press Set after adding the stitch.

This creates another decorative element around the label and helps prepare the design for the buttonholes.

Step 9: Create the Buttonholes – How to Embroider Fabric Labels

Create the Buttonholes - How to Embroider Fabric Labels

The buttonholes are an important part of this How to Embroider Fabric Labels project because they allow you to attach the finished label to your jar with ribbon.

I selected a straight buttonhole design.

The first buttonhole was too large, so I reduced the size.

I then moved the buttonhole into position.

Rotate the Buttonhole

Because of the direction I wanted the ribbon to sit, I rotated the buttonhole by 90 degrees.

Use the Edit function and select the rotate option.

Move the buttonhole into the correct position.

Once the first buttonhole is positioned correctly, duplicate it.

Move the duplicate to the opposite side of the label.

Try to keep the two buttonholes parallel so the ribbon will sit neatly when it is threaded through.

Preview the design to make sure both buttonholes are positioned correctly.

Step 10: Add the Satin Stitch Border – How to Embroider Fabric Labels

The final design element is the satin stitch.

Add the satin stitch and check that it is positioned correctly around the label.

Make any final adjustments to the size or position.

Look carefully at the design to make sure none of the elements overlap in a way that you don’t want them to.

Once everything looks good, your embroidery design is ready to stitch.

Step 11: Prepare the Embroidery Hoop – How to Embroider Fabric Labels

For my How to Embroider Fabric Labels project, I used a small embroidery hoop with wash-away stabilizer.

Hoop the stabilizer securely.

Make sure it is smooth and taut inside the hoop.

You don’t want the stabilizer to be loose because this can affect the embroidery.

Attach the hoop to your embroidery machine and load your completed design.

Step 12: Stitch the Placement Stitch – How to Embroider Fabric Labels

Stitch the Placement Stitch - How to Embroider Fabric Labels

Start the embroidery and allow the machine to stitch the placement stitch.

The placement stitch shows you exactly where your fabric needs to go.

Once the placement stitch has finished, place your fabric over the marked area.

I used a piece of fabric with a piece of batting behind it.

Position the fabric carefully so that it completely covers the placement area.

Secure the fabric with small pieces of masking tape.

Be careful that the tape does not interfere with the area where the needle will stitch.

Step 13: Stitch the Label – How to Embroider Fabric Labels

Now you can begin stitching the different elements of your label.

For the next part of How to Embroider Fabric Labels, I recommend using a light thread colour for the lettering or any element that you don’t want to overpower the design.

Allow the machine to stitch the word you selected.

For my project, the machine stitched PENS onto the label.

You can substitute your own word to make the label completely personalised.

Step 14: Add the Backing – How to Embroider Fabric Labels

Before stitching the buttonholes, remove the hoop from the machine.

Do not remove the project from the hoop.

This is important because you want to maintain the exact position of the project.

Now place your backing fabric onto the back of the project.

Make sure the backing completely covers the area.

Secure it carefully.

Stitch the Backing in Place

Return the hoop to the machine.

Stitch the placement stitch again.

This will secure the backing fabric to the back of the project.

Once the backing is secured, you can continue with the buttonholes.

Step 15: Stitch the Buttonholes – How to Embroider Fabric Labels

Stitch the Buttonholes - How to Embroider Fabric Labels

Now stitch the buttonholes.

The project should remain in the hoop while you stitch them.

Once the buttonholes have finished, remove the hoop from the machine.

Do not take the project out of the hoop just yet.

Step 16: Trim the Excess Fabric – How to Embroider Fabric Labels

Carefully trim away the excess fabric around the embroidered label.

Use sharp scissors and work slowly.

Be extremely careful not to cut the embroidery or the stabilizer inside the hoop.

You want to trim as close to the stitches as possible without cutting through them.

Turn the project over and trim the excess fabric from the reverse side as well.

Check all the way around the label.

Check the Edges

Make sure there are no loose threads sticking out.

Trim any threads that are visible.

The fabric should be cut neatly and closely around the embroidered stitches.

Also make sure that the same colour of thread is in the top and bottom of the machine before stitching the final elements.

Step 17: Remove the Fabric Label From the Hoop – How to Embroider Fabric Labels

Remove the Fabric Label From the Hoop - How to Embroider Fabric Labels

Once all of the embroidery is complete, remove the project from the hoop.

You should now have a cute embroidered fabric label ready to finish.

At this point, you can carefully open the buttonhole areas.

Use small, sharp scissors and work slowly.

Only cut the opening inside the stitched buttonhole.

Take care not to cut the surrounding stitches.

Step 18: Remove the Wash-Away Stabilizer – How to Embroider Fabric Labels

One of the great things about using wash-away stabilizer for How to Embroider Fabric Labels is that you can remove the remaining stabilizer with water.

Put some warm water onto your fingers.

Gently rub the stabilizer.

It should begin to dissolve.

Don’t be too rough with the project. Work gently and gradually remove the stabilizer around the embroidery.

Allow the label to dry completely.

Step 19: Add the Ribbon – How to Embroider Fabric Labels

Add the Ribbon - How to Embroider Fabric Labels

Now your fabric label is ready for the finishing touch.

I used a pretty pink ribbon.

Thread the ribbon through both buttonholes.

Arrange it so that the ribbon sits neatly across the back of the label.

You can then tie the ribbon around your jar.

This allows the label to be removed and changed whenever you want.

Step 20: Attach Your Finished Fabric Label – How to Embroider Fabric Labels

Tie the ribbon securely around your jar.

And that’s it!

You now have a cute personalised fabric label.

This How to Embroider Fabric Labels project would be perfect for organising your sewing room or adding a handmade touch to storage containers.

Ideas for Personalised Fabric Labels – How to Embroider Fabric Labels

Once you know How to Embroider Fabric Labels, you can make labels for almost anything.

Try making a collection of matching labels for your sewing room.

You could create labels that say:

  • PENS
  • THREAD
  • NEEDLES
  • RIBBON
  • BUTTONS
  • FABRIC
  • SEWING
  • EMBROIDERY
  • APPLIQUE

You could also change the shape, colours and decorative stitches to create completely different looks.

Make Labels for Gifts

These embroidered labels would also make lovely handmade gifts.

Add a personalised label to a basket, storage box or jar and fill it with sewing supplies, craft materials or treats.

Because the label is removable, the recipient can reuse it on another container.

Tips for Successful Machine Embroidered Labels – How to Embroider Fabric Labels

How to Embroider Fabric Labels

Choose the Right Size

When learning How to Embroider Fabric Labels, remember that small projects don’t need to be complicated.

A simple design with clear lettering can be more effective than trying to fit too many elements into a small area.

Use Contrasting Thread

Choose thread colours that contrast with your fabric.

This will make the lettering and decorative stitches easier to see.

Test Your Design

If you are unsure about the stitch density, lettering size or colours, make a test sample first.

This can save fabric and thread and lets you see exactly how the finished design will look.

Trim Carefully

The final appearance of your label depends greatly on how carefully you trim the excess fabric.

Take your time and use sharp embroidery scissors.

Cut close to the stitching without cutting the stitches themselves.

Why I Love This Fabric Label Project – How to Embroider Fabric Labels

I love this How to Embroider Fabric Labels project because it is quick, practical and easy to personalise.

It also gives you an opportunity to explore several features of IQ Designer, including shapes, fills, satin stitches, lettering, resizing, duplication and rotation.

You don’t have to make your label exactly like mine.

Once you understand the basic process, you can change the shape, colours, lettering and decorative stitches to create something completely unique.

A simple fabric label can turn an ordinary storage jar into something that looks beautiful and handmade.

Final Thoughts – How to Embroider Fabric Labels

I hope you enjoyed learning How to Embroider Fabric Labels using IQ Designer.

This is a wonderful little embroidery project for beginners because you can start with a simple shape and gradually build up the design using different stitches and lettering.

The finished label is perfect for organising your sewing room, labelling craft supplies or adding a personalised touch to your storage.

I used my label for a jar of pens, but there are so many other possibilities.

Try creating different labels for your sewing supplies and experiment with different fabrics, thread colours and decorative stitches.

If you enjoyed this How to Embroider Fabric Labels tutorial, don’t forget to like the video, subscribe to my YouTube channel and leave a comment to let me know what you would put on your own fabric label.

Happy sewing and embroidery!

Read this next Baby Lock Altair Tutorials | How to Embroider Babyโ€™s First Christmas Keepsake โ€“ A Beautiful Beginner Project https://faodailcreation.ca/2026/08/09/baby-lock-altair-tutorials-how-to-embroider-babys-first-christmas-keepsake/

Baby Lock Altair Tutorials, embroidery

Baby Lock Altair Tutorials | How to Embroider Babyโ€™s First Christmas Keepsake – A Beautiful Beginner Project

Cassie Cartmell – Faodail Creation

This is the full you tube tutorial Baby Lock Altair Tutorials | How to embroider Babyโ€™s First Christmas Keepsake https://youtu.be/BbPlcYFSt8k

Table of Contents

Creating a personalized Christmas keepsake is a wonderful way to celebrate a baby’s first Christmas. In this Baby Lock Altair Tutorials | How to Embroider Babyโ€™s First Christmas Keepsake project, Baby Lock Educator Cassie Cartmell will show you how to use the built-in embroidery designs and lettering on the Baby Lock Altair 2 to create a beautiful handmade decoration that can be treasured for years to come.

This is a particularly useful project if you own a Baby Lock Altair 2 because the machine includes a selection of built-in embroidery designs. As Baby Lock Educator Cassie Cartmell, I love finding creative ways to use the designs and features already built into the machine. Rather than letting those designs sit unused, why not turn one into a personalized Christmas keepsake?

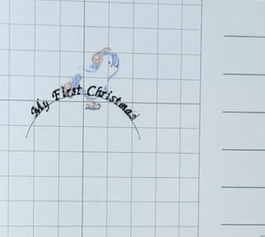
For this project, I chose a cute Christmas penguin and combined it with lettering, the baby’s name, and the year. Baby Lock Educator Cassie Cartmell will guide you through the process of creating the personalized embroidery and finishing it as a charming holiday decoration.

The finished embroidery can then be placed inside a small hand embroidery frame and finished with felt on the back. It makes a lovely handmade gift for a new baby, and you can personalize it for any child. Baby Lock Educator Cassie Cartmell hopes this project inspires you to explore the built-in designs on your Baby Lock Altair 2 and create a special keepsake that can be enjoyed for many Christmases to come.

What You Will Need for This Baby Lock Altair Tutorials | How to Embroider Babyโ€™s First Christmas Keepsake Project

What You Will Need for This Baby Lock Altair Tutorials | How to Embroider Babyโ€™s First Christmas Keepsake Project

Before getting started, gather everything you will need.

Materials – Baby Lock Altair Tutorials | How to Embroider Babyโ€™s First Christmas Keepsake

  • Baby Lock Altair 2 or compatible embroidery machine
  • Embroidery hoop
  • Fabric for the front
  • No-show mesh stabilizer
  • Embroidery thread
  • Bobbin thread
  • Needle
  • Hand-sewing thread
  • Hand embroidery frame
  • Felt for the back
  • Scissors
  • Embroidery scissors
  • Tape measure or ruler

You will also need a suitable built-in Christmas embroidery design.

The exact supplies can vary depending on the fabric and embroidery design you choose.

Choosing Your Embroidery Design – Baby Lock Altair Tutorials | How to Embroider Babyโ€™s First Christmas Keepsake

Choosing Your Embroidery Design - Baby Lock Altair Tutorials | How to Embroider Babyโ€™s First Christmas Keepsake

One of the great things about the Baby Lock Altair 2 is the collection of embroidery designs already available on the machine.

For a baby’s first Christmas project, look for something that has a festive theme.

I went into the Kids Corner section and looked through the available designs. There were several cute options, including a fox and penguins.

I chose the penguin that is ice skating because it worked particularly well with the Christmas theme.

The original design was approximately 3 inches by 3 inches, which was a good size for this project.

Setting Up the Design – Baby Lock Altair Tutorials | How to Embroider Babyโ€™s First Christmas Keepsake

Setting Up the Design - Baby Lock Altair Tutorials | How to Embroider Babyโ€™s First Christmas Keepsake

The first part of this Baby Lock Altair Tutorials | How to Embroider Babyโ€™s First Christmas Keepsake project takes place directly on the embroidery machine.

Once you have selected your embroidery design, you can begin editing it.

Select Edit and then go into the Size function.

The machine provides different ways of changing the size of an embroidery design. When resizing an embroidery design, it is important to use the option that recalculates the stitches.

This allows the machine to adjust the embroidery stitches appropriately for the new size.

Why Proper Resizing Matters – Baby Lock Altair Tutorials | How to Embroider Babyโ€™s First Christmas Keepsake

Why Proper Resizing Matters - Baby Lock Altair Tutorials | How to Embroider Babyโ€™s First Christmas Keepsake

Simply making an embroidery design larger or smaller without considering the stitch count can affect the finished embroidery.

When you use the appropriate resizing function, the machine can adjust the stitch information for the new size.

For this project, I experimented with making the penguin smaller.

The design could be reduced to approximately 2 inches, but I decided that was a little too small. I increased it again to around 3 inches.

This gave me a good balance between the embroidery design and the lettering.

Creating a 4 x 4 Design Area – Baby Lock Altair Tutorials | How to Embroider Babyโ€™s First Christmas Keepsake

Creating a 4 x 4 Design Area - Baby Lock Altair Tutorials | How to Embroider Babyโ€™s First Christmas Keepsake

Next, I brought a 4 x 4 hoop field onto the screen.

This is extremely helpful because it allows you to see how much space is available for your embroidery.

A 4 x 4 hoop provides a relatively small embroidery area, so you need to carefully plan where every element will go.

This is especially important when you are combining a decorative embroidery design with several lines of lettering.

Arranging the Penguin – Baby Lock Altair Tutorials | How to Embroider Babyโ€™s First Christmas Keepsake

Once the hoop field was visible, I moved the penguin slightly upward.

The Baby Lock Altair 2 makes it easy to move designs around on the screen.

If you hold down on the design, it can move quickly. If you tap it once, you can make smaller adjustments.

This makes it easier to position your embroidery accurately.

Don’t worry about getting everything perfect immediately. You can return to the design later and make additional adjustments.

Adding the Baby’s First Christmas Lettering – Baby Lock Altair Tutorials | How to Embroider Babyโ€™s First Christmas Keepsake

Adding the Baby's First Christmas Lettering - Baby Lock Altair Tutorials | How to Embroider Babyโ€™s First Christmas Keepsake

Now it is time to add the lettering.

Select Add and then choose the text function.

For a Christmas keepsake, I wanted the lettering to have a decorative appearance, so I selected a more elegant font.

Begin entering your wording.

For example, you can create lettering such as:

My First Christmas

You can switch between uppercase and lowercase letters as needed using the controls on the machine.

Creating Curved Lettering – Baby Lock Altair Tutorials | How to Embroider Babyโ€™s First Christmas Keepsake

Creating Curved Lettering - Baby Lock Altair Tutorials | How to Embroider Babyโ€™s First Christmas Keepsake

One of my favorite features for this project was the ability to arrange the lettering in a curve.

Before setting the lettering, use the array or curved lettering options to create the shape you want.

You can then adjust the amount of curve using the controls on the screen.

A gentle curve can help the lettering follow the shape of the decorative design and make the finished embroidery look much more professional.

Once you are happy with the lettering, set it and return to the editing screen.

You can then move it into position.

Adding the Baby’s Name – Baby Lock Altair Tutorials | How to Embroider Babyโ€™s First Christmas Keepsake

The next step in this Baby Lock Altair Tutorials | How to Embroider Babyโ€™s First Christmas Keepsake project is adding the baby’s name.

Select Add again and choose the text function.

Enter the child’s name and adjust the size to suit the available space.

For example, you might add the baby’s name underneath the Christmas wording.

Once the name has been created, select Set and then return to the editing screen.

Move the name into position.

You can continue to select the individual elements and move them around until you are happy with the overall arrangement.

Adding the Year – Baby Lock Altair Tutorials | How to Embroider Babyโ€™s First Christmas Keepsake

A baby’s first Christmas keepsake is even more special when you include the year.

Add another text element and enter the year.

Resize it if necessary and move it into the remaining space.

This gives you three important personalized elements:

  • A Christmas embroidery design
  • The baby’s name
  • The year

Together, these details create a keepsake that records a very special milestone.

Checking the Design Before Embroidering – Baby Lock Altair Tutorials | How to Embroider Babyโ€™s First Christmas Keepsake

Checking the Design Before Embroidering - Baby Lock Altair Tutorials | How to Embroider Babyโ€™s First Christmas Keepsake

Before moving on to embroidery, take some time to carefully check the design.

Select each individual element and make sure it is positioned correctly.

You can move designs horizontally or vertically, rotate them, resize them, and make other adjustments.

The machine also provides centering options, which are useful when you want to make sure your design elements are properly aligned.

I like to use the centering functions as a final check.

Making Everything Fit

One issue with using a 4 x 4 hoop is that the available space is limited.

Once all of the lettering and the embroidery design had been added, the complete design was too large for the 4 x 4 embroidery area.

The solution was to reduce some of the elements.

Go back into the Size function and make the design smaller as necessary.

You can also resize the baby’s name and other lettering.

Continue making small adjustments until everything fits comfortably within the embroidery field.

Why a 5 x 7 Hoop Is Helpful – Baby Lock Altair Tutorials | How to Embroider Babyโ€™s First Christmas Keepsake

This project also demonstrates why having a larger embroidery hoop can be useful.

A 4 x 4 hoop is very limiting when you want to combine multiple designs and several lines of lettering.

The Baby Lock Altair 2 includes a 5 x 7 hoop option, which provides considerably more room for creative projects.

If you are considering purchasing an embroidery machine and you know that you want to make larger personalized projects, the embroidery area is definitely something worth considering.

Preparing the Fabric and Stabilizer – Baby Lock Altair Tutorials | How to Embroider Babyโ€™s First Christmas Keepsake

Preparing the Fabric and Stabilizer - Baby Lock Altair Tutorials | How to Embroider Babyโ€™s First Christmas Keepsake

For this project, I used two pieces of no-show mesh stabilizer.

Place the stabilizer appropriately before hooping your fabric.

The correct stabilizer is extremely important when embroidering.

It helps support the fabric while the machine stitches the design and can help prevent problems such as puckering.

The stabilizer you choose should be suitable for both your fabric and the density of your embroidery design.

Why Stabilization Matters

If you are experiencing puckering around your embroidery, the stabilizer is one of the first things you should check.

Different fabrics and embroidery designs require different stabilization techniques.

A dense embroidery design requires adequate support because the machine is placing many stitches into the fabric.

Take some time to understand which stabilizer works best with your particular project.

Stitching the Embroidery Design – Baby Lock Altair Tutorials | How to Embroider Babyโ€™s First Christmas Keepsake

Once your fabric is hooped and the design has been transferred to the embroidery section of the machine, you are ready to begin stitching.

Set the machine to embroidery and check your first thread color.

The machine will guide you through the different thread colors and stages of the design.

Once everything has been checked, start the embroidery.

The machine will stitch the design automatically.

Monitoring Your Embroidery – Baby Lock Altair Tutorials | How to Embroider Babyโ€™s First Christmas Keepsake

Monitoring Your Embroidery - Baby Lock Altair Tutorials | How to Embroider Babyโ€™s First Christmas Keepsake

One particularly useful feature of the Baby Lock Altair 2 is the IQ monitoring app.

During this Baby Lock Altair Tutorials | How to Embroider Babyโ€™s First Christmas Keepsake project, you can use the app to monitor your embroidery without standing directly beside the machine.

The app can show information such as:

  • The current stitching progress
  • The number of stitches remaining
  • The estimated time remaining
  • The number of thread changes
  • Notifications about thread changes
  • Bobbin information

This can be convenient if you need to step away from the machine for a few minutes.

You can check the progress without constantly watching the embroidery machine.

Finishing the Embroidery – Baby Lock Altair Tutorials | How to Embroider Babyโ€™s First Christmas Keepsake

Once the embroidery is complete, carefully remove the fabric from the hoop.

For this project, I don’t remove all of the stabilizer from the back.

There is no need to remove it completely because the embroidery will eventually be mounted into a hand embroidery frame.

Trim away the excess stabilizer carefully, leaving enough in place to support the embroidery.

Mounting the Embroidery in a Frame – Baby Lock Altair Tutorials | How to Embroider Babyโ€™s First Christmas Keepsake

Baby Lock Altair Tutorials | How to Embroider Babyโ€™s First Christmas Keepsake

The next step turns your embroidery into a finished Christmas keepsake.

Place the embroidered fabric into the hand embroidery frame.

Once it is positioned correctly, turn the frame over and look at the excess fabric on the back.

You want to secure the fabric so that it is pulled neatly and tightly around the back of the frame.

Securing the Fabric

Using a needle and thread, begin basting around the excess fabric.

Make sure your thread is secure.

As you work around the frame, gently pull the thread so that the fabric becomes taut.

Take care not to pull so aggressively that you distort the embroidery.

The goal is to create a smooth, neat finish on the front of the keepsake.

Adding a Felt Backing – Baby Lock Altair Tutorials | How to Embroider Babyโ€™s First Christmas Keepsake

To give the finished project a professional appearance, add a piece of felt to the back.

Measure the inside of the frame and cut a piece of felt to fit.

Position the felt over the back of the embroidery.

You can then use a blanket stitch to sew around the edge and secure the felt in place.

This hides the unfinished fabric and stabilizer while giving the back of the keepsake a neat handmade finish.

A Special Handmade Christmas Gift – Baby Lock Altair Tutorials | How to Embroider Babyโ€™s First Christmas Keepsake

The finished embroidery makes a lovely baby’s first Christmas gift.

Because it includes the baby’s name and the year, it becomes much more than a simple Christmas decoration.

It is something that can be brought out every Christmas as a reminder of that very first Christmas.

You could also customize the project with different built-in Baby Lock embroidery designs, fonts, colors, and wording.

Final Thoughts – Baby Lock Altair Tutorials | How to Embroider Babyโ€™s First Christmas Keepsake

Final Thoughts - Baby Lock Altair Tutorials | How to Embroider Babyโ€™s First Christmas Keepsake

This Baby Lock Altair Tutorials | How to Embroider Babyโ€™s First Christmas Keepsake project is a great example of how you can use the built-in features of your embroidery machine to create something personal and meaningful.

The Baby Lock Altair 2 provides plenty of opportunities to experiment with embroidery designs, lettering, resizing, positioning, and personalization.

Don’t be discouraged if your first embroidery project isn’t perfect. There is always a learning curve when working with a new machine or technique.

The more projects you make, the more comfortable you will become with choosing stabilizers, positioning designs, selecting thread, and adjusting embroidery settings.

Most importantly, have fun with the process.

A personalized baby’s first Christmas keepsake is a wonderful project to make for your own family or as a thoughtful handmade gift for someone special.

And once you understand the basic process, you can use the same techniques to create many other personalized embroidery projects throughout the year.

Want to Try More Baby Lock Embroidery Projects? – Baby Lock Altair Tutorials | How to Embroider Babyโ€™s First Christmas Keepsake

If you enjoyed this Baby Lock Altair Tutorials | How to Embroider Babyโ€™s First Christmas Keepsake project, there are many other ways to use your Baby Lock embroidery machine.

Experiment with the built-in designs, try different fonts, personalize gifts with names and dates, and explore different hoop sizes.

The more you use the embroidery features on your machine, the more confident you will become.

Read this next : Baby Lock Altair 2 In the Hoop Christmas Placemat : Easy Holiday Embroidery Tutorial https://faodailcreation.ca/2026/07/22/baby-lock-altair-2-in-the-hoop-christmas-placemat/

Baby Lock Altair Tutorials, embroidery

Baby Lock Altair Tutorials | In the Hoop Christmas Placemat

This is the full you tube tutorial – Baby Lock Altair 2 Tutorial : In-the-Hoop Christmas Placemat Embroidery with IQ Designer https://youtu.be/R0yy1mAmALs

Cassie Cartmell – Faodail Creation

Table of Contents

Creating a Baby Lock Altair 2 In the Hoop Christmas Placemat is a fun and creative way to combine embroidery, sewing, and holiday decorating into one beautiful project. In this step-by-step tutorial, Baby Lock Educator Cassie Cartmell will show you how to design and stitch an in-the-hoop Christmas placemat using the amazing features of the Baby Lock Altair 2 embroidery machine and IQ Designer.

This project is perfect for adding handmade Christmas dรฉcor to your home, creating thoughtful gifts, or learning new embroidery techniques with your machine. As Baby Lock Educator Cassie Cartmell, I love sharing creative projects that help you explore your embroidery machine while building confidence with new techniques.

For this Baby Lock Altair 2 In the Hoop Christmas Placemat, I will be using IQ Designer to create the placemat shape, add decorative stitching, combine embroidery elements, and finish the placemat completely in the hoop. Baby Lock Educator Cassie Cartmell will guide you through the process so you can follow along and create your own festive Christmas placemat.

If you would like the complete cutting measurements for this project, make sure to join my Facebook group where you can download the printable cutting sheet from the Files section. Baby Lock Educator Cassie Cartmell is excited to help you create beautiful handmade projects while getting the most from your Baby Lock Altair 2 and IQ Designer.


What Is an In the Hoop Christmas Placemat?

What Is an In the Hoop Christmas Placemat

An in-the-hoop embroidery project is created almost completely using your embroidery machine hoop. Instead of stitching every step separately on a sewing machine, the embroidery machine helps create the design, decorative stitching, and construction steps.

The advantage of making a Baby Lock Altair 2 In the Hoop Christmas Placemat is that the machine handles the placement stitching and decorative embroidery with incredible accuracy.

The Baby Lock Altair 2 allows you to:

  • Create custom shapes using IQ Designer
  • Add embroidery designs
  • Create decorative fill patterns
  • Save your designs directly to the machine
  • Combine multiple embroidery elements into one project

This makes it an excellent project for embroidery beginners as well as experienced makers who want to explore more creative possibilities.


Supplies Needed for the Baby Lock Altair 2 In the Hoop Christmas Placemat

Supplies Needed for the Baby Lock Altair 2 In the Hoop Christmas Placemat

Before starting your project, gather all your supplies.

Fabric Supplies – Baby Lock Altair 2 In the Hoop Christmas Placemat

You will need:

  • Christmas fabric for the front of your placemat
  • Fabric for the back of your placemat
  • Batting for structure and stability
  • Embroidery thread in your chosen Christmas colours
  • Bobbin thread
  • Stabilizer suitable for your fabric
  • Masking tape or painterโ€™s tape

Embroidery Supplies – Baby Lock Altair 2 In the Hoop Christmas Placemat

For this project you will need:

  • Baby Lock Altair 2 embroidery machine
  • Embroidery hoop
  • IQ Designer feature
  • Christmas embroidery design
  • Embroidery scissors
  • Thread changes as needed

Step 1: Find the Centre of Your Fabric – Baby Lock Altair 2 In the Hoop Christmas Placemat

Baby Lock Altair 2 In the Hoop Christmas Placemat : Easy Holiday Embroidery Tutorial

The first step in creating your Baby Lock Altair 2 In the Hoop Christmas Placemat is preparing your fabric and finding the centre point.

Having the centre marked makes placing your embroidery design much easier.

Take your top fabric piece and fold it in half.

Fold it in half again in the opposite direction.

When you open the fabric back up, you will have a clear centre point where the folds meet.

Using a friction pen, lightly mark this centre point.

A friction pen works well because the embroidery stitching will cover the marking, and any remaining marks can be removed with heat.


Step 2: Hoop Your Fabric and Batting – Baby Lock Altair 2 In the Hoop Christmas Placemat

Place your batting and top fabric together.

Make sure everything is smooth and positioned correctly before placing it into your embroidery hoop.

Take your time when hooping because proper placement will help your embroidery stitch beautifully.

Once your fabric is hooped, move over to your Baby Lock Altair 2.

Creating the Placemat Shape Using Baby Lock Altair 2 IQ Designer – Baby Lock Altair 2 In the Hoop Christmas Placemat

One of my favourite features of the Baby Lock Altair 2 is IQ Designer. This allows you to create your own embroidery shapes directly on your machine.

For this Baby Lock Altair 2 In the Hoop Christmas Placemat, we will first create the basic rectangle shape that forms the foundation of the project.


Step 3: Create the Base Rectangle Stitch – Baby Lock Altair 2 In the Hoop Christmas Placemat

Create the Base Rectangle Stitch - Baby Lock Altair 2 In the Hoop Christmas Placemat

From the main screen of your Baby Lock Altair 2:

  1. Select IQ Designer
  2. Choose the rectangle shape
  3. Adjust the size to:
  • Width: 14 inches
  • Height: 9.17 inches

Once your rectangle is the correct size:

  1. Change the stitch type to a running stitch
  2. Select your preferred colour
  3. Confirm your settings
  4. Save the design into IQ Designer memory

You can also save the design into the embroidery side of your machine.

This allows you to easily access your design later and make adjustments if needed.


Saving Your Designs on the Baby Lock Altair 2 – Baby Lock Altair 2 In the Hoop Christmas Placemat

A great feature of the Baby Lock Altair 2 is the ability to save your custom designs.

For this project, I saved:

  • The base rectangle stitching
  • The decorative fill area
  • The Christmas tree embroidery design
  • The final finishing rectangle

Saving each element separately makes assembling your final embroidery project much easier.


Adding the Christmas Tree Embroidery Design – Baby Lock Altair 2 In the Hoop Christmas Placemat

Adding the Christmas Tree Embroidery Design - Baby Lock Altair 2 In the Hoop Christmas Placemat

Now it is time to add the Christmas design element.

From the embroidery menu:

  1. Select your Christmas tree design
  2. Place it in the centre area of your placemat
  3. Rotate the design if needed
  4. Save the design into memory

For this project, I used the Christmas tree embroidery design included on the Baby Lock Altair 2.

You can also experiment with your own embroidery designs to create different holiday themes.

Creating the Decorative Fill Stitch – Baby Lock Altair 2 In the Hoop Christmas Placemat

The next step in this Baby Lock Altair 2 In the Hoop Christmas Placemat tutorial is creating a decorative fill area inside the placemat.

The fill stitch adds texture and interest behind the Christmas tree design and gives your finished placemat a professional embroidered look.

Using IQ Designer, you can create beautiful decorative backgrounds without needing a separate embroidery file.

Step 4: Create the Fill Design in IQ Designer – Baby Lock Altair 2 In the Hoop Christmas Placemat

Create the Fill Design in IQ Designer - Baby Lock Altair 2 In the Hoop Christmas Placemat

From the main screen of your Baby Lock Altair 2:

  1. Open IQ Designer
  2. Select your shapes menu
  3. Choose the rectangle shape
  4. Resize the rectangle slightly smaller than your original placement outline

For this project, the inside rectangle was approximately:

  • Width: 13.5 inches
  • Height: 9 inches

The smaller rectangle creates a border area around your design.


Adding a Decorative Fill Pattern – Baby Lock Altair 2 In the Hoop Christmas Placemat

Adding a Decorative Fill Pattern - Baby Lock Altair 2 In the Hoop Christmas Placemat

Once your rectangle is created:

  1. Press the fill option
  2. Choose a decorative fill pattern
  3. Select your preferred design
  4. Adjust the size if needed
  5. Preview your design

The Baby Lock Altair 2 gives you many different fill options, so you can customize your Baby Lock Altair 2 In the Hoop Christmas Placemat to match your holiday fabric and embroidery thread colours.

You can choose:

  • Traditional Christmas patterns
  • Modern geometric fills
  • Textured backgrounds
  • Simple quilting-style fills

Once you are happy with the design:

  1. Save the fill design
  2. Add it to your embroidery memory
  3. Preview your complete design

Creating the Final Placement Stitch – Baby Lock Altair 2 In the Hoop Christmas Placemat

The final rectangle stitch is used to attach the backing fabric later in the process.

This is an important step because it creates the stitching line that connects the front and back pieces of your placemat.

Step 5: Create the Finishing Rectangle – Baby Lock Altair 2 In the Hoop Christmas Placemat

Return to IQ Designer.

Create another rectangle shape.

This rectangle needs to be smaller than your original outline.

Adjust the size to approximately:

  • Width: 13 inches
  • Height: 8 inches

Change the stitch type to:

Running Stitch

Save this design into your embroidery memory.

Now you have all the pieces needed to complete your Baby Lock Altair 2 In the Hoop Christmas Placemat:

โœ” Base placement stitch
โœ” Decorative fill stitch
โœ” Christmas tree embroidery design
โœ” Final backing stitch


Combining the Embroidery Elements – Baby Lock Altair 2 In the Hoop Christmas Placemat

Combining the Embroidery Elements - Baby Lock Altair 2 In the Hoop Christmas Placemat

Now it is time to arrange all your saved designs together.

From the embroidery screen:

  1. Select your saved designs
  2. Add the base stitch first
  3. Add the decorative fill
  4. Add your Christmas tree embroidery
  5. Add the final rectangle stitch

The order is important because each step builds on the previous one.

The Baby Lock Altair 2 makes this process simple because you can save each element and combine them exactly where you need them.


Stitching the Baby Lock Altair 2 In the Hoop Christmas Placemat

Now we are ready for the fun part stitching!

Place your hoop onto the Baby Lock Altair 2 embroidery unit.

I like to hold the back of the hoop while attaching it to the machine to make sure it clicks securely into place.


Step 6: Stitch the Placement Outline – Baby Lock Altair 2 In the Hoop Christmas Placemat

Stitch the Placement Outline - Baby Lock Altair 2 In the Hoop Christmas Placemat

The first stitch your machine will sew is the base outline.

This stitching line shows where your embroidery and fabric placement will be positioned.

The Baby Lock Altair 2 will stitch this outline twice to make sure the placement line is clear.

Once the outline is complete, the machine will move on to the decorative fill.


Step 7: Stitch the Decorative Fill Background – Baby Lock Altair 2 In the Hoop Christmas Placemat

Choose your embroidery thread colour for the fill section.

For a Christmas placemat, you could use:

  • Gold
  • Silver
  • White
  • Cream
  • Red
  • Green

The fill stitch creates a beautiful textured background behind your Christmas design.

One thing I love about embroidery projects is that the design often looks completely different once it is stitched compared to how it appears on the screen.

The detail, texture, and thread shine really bring the project to life.


Using IQ Monitoring with the Baby Lock Altair 2 – Baby Lock Altair 2 In the Hoop Christmas Placemat

Using IQ Monitoring with the Baby Lock Altair 2 - Baby Lock Altair 2 In the Hoop Christmas Placemat

One of the great features of the Baby Lock Altair 2 is the IQ Monitoring app.

While your embroidery design is stitching, you can monitor your project.

The app allows you to see:

  • How many stitches are completed
  • How many stitches remain
  • Current embroidery progress
  • When thread changes are needed
  • When your bobbin thread is running low

This is extremely helpful for larger embroidery projects like this Baby Lock Altair 2 In the Hoop Christmas Placemat.

You can step away while keeping track of your machine.


Changing Bobbin Thread During Embroidery – Baby Lock Altair 2 In the Hoop Christmas Placemat

If your bobbin thread runs low during stitching, do not panic.

Follow these steps:

  1. Stop the embroidery machine
  2. Use the scissors function to cut the thread
  3. Carefully remove the hoop
  4. Replace your bobbin
  5. Attach the hoop again
  6. Press return
  7. Continue stitching

The Baby Lock Altair 2 will continue from where it stopped.

This feature helps prevent mistakes and protects your embroidery design.


Skipping Unwanted Colour Changes – Baby Lock Altair 2 In the Hoop Christmas Placemat

Sometimes embroidery designs include elements you do not want.

For example, I had a black outline stitch that I decided to skip.

The Baby Lock Altair 2 allows you to move through colour changes and skip sections of a design.

This is useful when customizing embroidery projects.

You can:

  • Remove unwanted details
  • Change the order of stitching
  • Simplify designs
  • Personalize your project

Stitching the Christmas Tree Design – Baby Lock Altair 2 In the Hoop Christmas Placemat

Stitching the Christmas Tree Design - Baby Lock Altair 2 In the Hoop Christmas Placemat

Now it is time for the Christmas tree embroidery.

Choose your thread colours and let your Baby Lock Altair 2 create the design.

For this project, I used:

  • A creamy/silver colour for detail
  • Gold thread for highlights
  • Black thread for final details

Remember not to remove your embroidery from the hoop after the design is complete.

The final stitching step will attach the backing fabric.


Adding the Backing Fabric to Your Christmas Placemat

This is one of the most important parts of creating your Baby Lock Altair 2 In the Hoop Christmas Placemat.

You want your backing fabric prepared before moving forward.

Step 8: Prepare the Back Fabric – Baby Lock Altair 2 In the Hoop Christmas Placemat

Take your two backing fabric pieces.

Fold the edges over to create a finished hem.

Fold:

  • Approximately ยฝ inch
  • Fold again approximately ยผ inch

Press the folds into place.

Take these pieces to your sewing machine and stitch the hems securely.

Attaching the Backing Fabric to the Embroidered Placemat – Baby Lock Altair 2 In the Hoop Christmas Placemat

Attaching the Backing Fabric to the Embroidered Placemat - Baby Lock Altair 2 In the Hoop Christmas Placemat

Now we are ready for the final construction step of this Baby Lock Altair 2 In the Hoop Christmas Placemat.

This is where your embroidery project starts to look like a finished handmade holiday placemat.

The great thing about an in-the-hoop project is that your embroidery machine has already done most of the work. The final stitching line will secure the backing fabric and create the finished shape.


Step 9: Position the Backing Fabric – Baby Lock Altair 2 In the Hoop Christmas Placemat

Take your prepared backing fabric pieces and place them over the embroidered design.

Make sure the right sides of the fabric are facing together.

Your backing fabric pieces should cover the entire stitching area.

Before continuing, check:

  • The fabric covers all placement lines
  • The finished hemmed edges are facing the centre
  • The two backing pieces overlap in the middle

You want approximately 2 inches of overlap in the centre.

This overlap allows you to turn your placemat right side out after stitching.


Important Tip – Use Masking Tape Before the Final Stitch – Baby Lock Altair 2 In the Hoop Christmas Placemat

Important Tip - Use Masking Tape Before the Final Stitch - Baby Lock Altair 2 In the Hoop Christmas Placemat

This is one of the most important tips when making your Baby Lock Altair 2 In the Hoop Christmas Placemat.

When your embroidery machine foot moves over bulky seams, it can sometimes catch on the raised edges of the fabric.

This can cause:

  • Fabric shifting
  • Uneven stitching
  • Thread breaks
  • Damage to your embroidery design

To prevent this, use masking tape or painterโ€™s tape.

Place tape over:

  • The overlapping centre seam
  • Any thick fabric edges
  • Areas where the embroidery foot may catch

I used inexpensive painterโ€™s tape from the dollar store, and it worked perfectly.

The tape holds the fabric securely while allowing the embroidery foot to glide smoothly.


Step 10: Stitch the Final Rectangle – Baby Lock Altair 2 In the Hoop Christmas Placemat

Return your hoop to the Baby Lock Altair 2.

Change your thread colour if needed.

Start the final rectangle stitch.

This stitch will sew around the outside edge of the placemat and attach the backing fabric.

Watch your machine carefully during this step.

If the embroidery foot begins to pull against a thick seam:

  1. Press the stop button
  2. Add another piece of tape
  3. Continue stitching

Taking a few extra seconds here can save your project.


Removing the Placemat from the Hoop – Baby Lock Altair 2 In the Hoop Christmas Placemat

Once the final rectangle has stitched completely:

  1. Remove the hoop from your Baby Lock Altair 2
  2. Carefully remove the embroidery from the hoop
  3. Remove the masking tape
  4. Cut around the outside stitching line

Leave approximately ยผ inch seam allowance around the outside edge.

Take your time when trimming.

A sharp pair of embroidery scissors will help you get clean, accurate edges.


Step 11: Turn Your Christmas Placemat Right Side Out – Baby Lock Altair 2 In the Hoop Christmas Placemat

Turn Your Christmas Placemat Right Side Out - Baby Lock Altair 2 In the Hoop Christmas Placemat

Now comes the exciting part!

Turn the placemat through the opening created by the overlapping backing fabric.

Gently push out the corners.

At this stage, your placemat may not look completely flat.

That is normal.

The final step is pressing.


Step 12: Press Your Finished Placemat – Baby Lock Altair 2 In the Hoop Christmas Placemat

Using an iron, carefully press your finished Baby Lock Altair 2 In the Hoop Christmas Placemat.

Pressing will:

  • Flatten the seams
  • Shape the corners
  • Smooth the fabric
  • Give your placemat a professional finish

Be careful around embroidered areas and use the appropriate heat setting for your fabric.

Once pressed, your Christmas placemat is complete!


Finished Baby Lock Altair 2 In the Hoop Christmas Placemat – Baby Lock Altair 2 In the Hoop Christmas Placemat

You have now created a beautiful handmade holiday project using your Baby Lock Altair 2 embroidery machine.

This project combines:

  • Machine embroidery
  • IQ Designer creativity
  • Custom design creation
  • Sewing techniques
  • Holiday decorating

I love how the Baby Lock Altair 2 allows you to create a complete project from start to finish.

Instead of only stitching purchased embroidery designs, you can customize your own shapes, add decorative fills, and create unique handmade pieces.


Tips for Successful In the Hoop Embroidery Projects – Baby Lock Altair 2 In the Hoop Christmas Placemat

Tips for Successful In the Hoop Embroidery Projects - Baby Lock Altair 2 In the Hoop Christmas Placemat

Making an in the hoop Christmas placemat is easier when you keep a few helpful tips in mind.

Always Test Your Design First

Before stitching your final fabric, consider testing your design on scrap fabric.

This helps you check:

  • Placement
  • Thread colours
  • Stitch density
  • Size

A quick test can prevent mistakes on your finished project.


Use Quality Stabilizer – Baby Lock Altair 2 In the Hoop Christmas Placemat

Stabilizer is extremely important for embroidery projects.

The right stabilizer helps:

  • Prevent puckering
  • Support dense embroidery
  • Keep designs looking professional

Choose stabilizer based on your fabric weight and embroidery design.


Watch Dense Embroidery Areas – Baby Lock Altair 2 In the Hoop Christmas Placemat

Christmas designs often include detailed stitching.

Dense embroidery can create extra tension on fabric.

If your design has many stitches:

  • Use good quality stabilizer
  • Check your thread tension
  • Avoid rushing the process

Save Your IQ Designer Files – Baby Lock Altair 2 In the Hoop Christmas Placemat

One of my favourite features of the Baby Lock Altair 2 is being able to save your creations.

Saving your designs means you can:

  • Resize projects later
  • Change colours
  • Create matching projects
  • Reuse your favourite shapes

Your Christmas placemat design could easily become:

  • A matching table runner
  • Mug rugs
  • Coasters
  • Christmas wall dรฉcor
  • Holiday pillows

Why I Love Making Christmas Projects on the Baby Lock Altair 2 – Baby Lock Altair 2 In the Hoop Christmas Placemat

The Baby Lock Altair 2 makes embroidery projects incredibly enjoyable.

The IQ Designer feature opens up so many creative possibilities because you are not limited to pre-made designs.

You can create:

  • Your own shapes
  • Custom quilting designs
  • Decorative backgrounds
  • Personalized gifts

For this Baby Lock Altair 2 In the Hoop Christmas Placemat, I was able to design the shape, add embroidery, create the background fill, and finish the entire project with my embroidery machine.

The result is a unique handmade Christmas decoration that can be enjoyed year after year.


Frequently Asked Questions About Baby Lock Altair 2 In the Hoop Christmas Placemat Projects – Baby Lock Altair 2 In the Hoop Christmas Placemat

Baby Lock Altair 2 In the Hoop Christmas Placemat Tutorial

Can beginners make an in-the-hoop Christmas placemat?

Yes!

This project is suitable for beginners who are learning embroidery.

The Baby Lock Altair 2 helps guide you through each stitching step, and the IQ Designer feature makes creating custom projects easier than many people expect.


Do I need the Baby Lock Altair 2 to make this project?

This tutorial was created specifically for the Baby Lock Altair 2, but similar techniques may work on other embroidery machines with design editing features.

The steps may vary depending on your machine model.


Can I change the size of this Christmas placemat? – Baby Lock Altair 2 In the Hoop Christmas Placemat

Yes!

One of the benefits of creating your own design in IQ Designer is that you can customize the size.

You can make:

  • Larger placemats
  • Smaller children’s placemats
  • Matching table decorations

Always check your hoop size before resizing.


Final Thoughts on This Baby Lock Altair 2 In the Hoop Christmas Placemat Tutorial

Creating a Baby Lock Altair 2 In the Hoop Christmas Placemat is a wonderful way to combine embroidery and sewing into a beautiful holiday project.

From designing your rectangle in IQ Designer, adding decorative fill stitches, stitching the Christmas tree embroidery, and finishing with the backing fabric, every step allows you to be creative.

The Baby Lock Altair 2 makes it possible to transform simple fabric into a professional-looking handmade decoration.

Whether you are making this for your own Christmas table, creating gifts for family and friends, or simply enjoying embroidery, this project is a fun way to celebrate the holiday season.

I hope this tutorial inspires you to try your own Baby Lock Altair 2 In the Hoop Christmas Placemat.

Happy stitching!

Read this next : How to Sew an Easter Pillow with Baby Lock Altair โ€“ Easy & Adorable Bunny Cushion Tutorial https://faodailcreation.ca/2026/03/25/faodail-creation-how-to-sew-an-easter-pillow/

Baby Lock Altair Tutorials, embroidery

Halloween Coaster Tutorial – Baby Lock Altair Tutorials

Cassie Cartmell – Foadail Creation

This is the full you tube tutorial – Baby Lock Altair : Halloween Coaster Tutorial https://youtu.be/5uOvCaLxI5U

Table of Contents

Baby Lock Altair Halloween Coaster Tutorial

Baby Lock Altair Halloween Coaster Tutorial - Amazing DIY Embroidery Project for Halloween

If you’re looking for a fun Halloween embroidery project, this Baby Lock Altair: Halloween Coaster Tutorial is the perfect place to start. As Baby Lock Educator Cassie Cartmell, I’m excited to show you how to make a festive embroidered coaster using the powerful IQ Designer features built into the Baby Lock Altair.

In this step-by-step guide, you’ll learn how to create a spooky cauldron design from start to finish with easy-to-follow instructions. Baby Lock Educator Cassie Cartmell will walk you through the creative process so you can confidently explore the features of your embroidery machine while creating a fun Halloween project.

Whether you’re new to machine embroidery or already familiar with your Baby Lock Altair, this tutorial will walk you through every stage of the project with confidence. As Baby Lock Educator Cassie Cartmell, I share practical techniques and helpful tips that will help you get the most from your embroidery machine while building your skills with every project.

By the end of this Baby Lock Altair: Halloween Coaster Tutorial, you’ll have a professionally finished coaster that’s perfect for decorating your home, gifting to friends, or selling at craft fairs. As Baby Lock Educator Cassie Cartmell, my goal is to help you enjoy your embroidery journey while giving you the confidence to create beautiful projects you’ll be proud to display every Halloween.


Why Make This Baby Lock Altair Halloween Coaster Tutorial Project?

Why Make This Baby Lock Altair Halloween Coaster Tutorial Project

Halloween is the perfect season to create festive embroidery projects. This coaster is quick to stitch, uses only a small amount of fabric, and is an excellent way to practise using IQ Designer.

Benefits include:

  • Great for Halloween decorating
  • Uses fabric scraps
  • Excellent beginner embroidery project
  • Learn how to combine IQ Designer features
  • Perfect handmade gift
  • Easy to customize with different fabrics

This Baby Lock Altair : Halloween Coaster Tutorial is also an excellent way to become more confident using built-in embroidery designs and creating your own embroidery layouts.


Supplies for the Baby Lock Altair Halloween Coaster Tutorial

Supplies for the Baby Lock Altair Halloween Coaster Tutorial

Before you begin, gather the following materials:

Embroidery Supplies

  • Baby Lock Altair embroidery machine
  • Embroidery hoop
  • Halloween fabric
  • Backing fabric
  • Cotton batting
  • Wash-away water-soluble stabilizer
  • Masking tape
  • Embroidery thread
  • Bobbin thread
  • Embroidery scissors

Using water-soluble stabilizer makes this Baby Lock Altair : Halloween Coaster Tutorial much easier to finish because the excess stabilizer washes away cleanly after stitching.


Step 1 โ€“ Select the Cauldron Embroidery Design – Baby Lock Altair : Halloween Coaster Tutorial

Select the Cauldron Embroidery Design - Baby Lock Altair : Halloween Coaster Tutorial

Begin by opening the embroidery section of your Baby Lock Altair.

Navigate to:

Embroidery โ†’ Celebrate

Select the Halloween cauldron embroidery design.

If the design is already the correct size, create a stamp of the design and save it into IQ Designer memory.

Next, save the embroidery design into the embroidery memory so you don’t need to resize it later.

Saving your work at this stage makes the rest of this Baby Lock Altair : Halloween Coaster Tutorial much faster.


Step 2 โ€“ Create Your Coaster Shape in IQ Designer – Baby Lock Altair : Halloween Coaster Tutorial

Create Your Coaster Shape in IQ Designer - Baby Lock Altair : Halloween Coaster Tutorial

Return to the Home screen and open IQ Designer.

Choose a shape for your coaster.

For this project, a curved-edge rectangle works beautifully, although you can choose whichever shape you prefer.

Resize the shape to approximately 516.

Next:

  • Change the outline to a running stitch.
  • Select your preferred thread colour.
  • Fill the shape.
  • Preview the design.
  • Save it into IQ Designer memory.
  • Save it again into embroidery memory.

This running stitch will become your placement line later in the project.


Step 3 โ€“ Create the Satin Stitch Border – Baby Lock Altair : Halloween Coaster Tutorial

Create the Satin Stitch Border - Baby Lock Altair : Halloween Coaster Tutorial

Open the coaster outline again inside IQ Designer.

Select the shape and change the border to a satin stitch.

Adjust the satin stitch width to approximately 180.

Remember to press Set after making changes, otherwise your settings won’t be saved.

Preview the design before saving it into both IQ Designer memory and embroidery memory.

Creating the satin border separately gives your finished coaster a clean professional appearance.


Step 4 โ€“ Add the Meander Background – Baby Lock Altair : Halloween Coaster Tutorial

Add the Meander Background - Baby Lock Altair : Halloween Coaster Tutorial

Return to IQ Designer.

Open your running stitch coaster shape.

Now bring in the outline of the cauldron embroidery design.

Choose a Meander Fill for the background.

Change the fill colour to black.

Turn the outline option to No so only the meander fill stitches.

Preview the design and save it into both IQ Designer memory and embroidery memory.

This decorative fill creates a beautiful textured background that really makes the cauldron embroidery stand out.


Step 5 โ€“ Build the Complete Embroidery Design – Baby Lock Altair : Halloween Coaster Tutorial

Build the Complete Embroidery Design - Baby Lock Altair : Halloween Coaster Tutorial

Now it’s time to assemble every part of the coaster.

Open the embroidery screen and add the designs in this order:

Placement Stitch

This running stitch marks exactly where your fabric will sit.

Tack Down Stitch

Duplicate the running stitch to secure the batting and fabric.

Meander Background

Add the decorative meander fill.

Cauldron Embroidery

Insert the Halloween cauldron design.

Second Tack Down Stitch

Duplicate the running stitch again.

This stitch secures the backing fabric before the final border.

Satin Stitch Border

Finish by adding the satin stitch border around the outside.

Following this sequence ensures every stage of the Baby Lock Altair : Halloween Coaster Tutorial stitches perfectly.


Step 6 โ€“ Hoop the Stabilizer – Baby Lock Altair : Halloween Coaster Tutorial

Hoop the Stabilizer - Baby Lock Altair : Halloween Coaster Tutorial

Hoop a piece of wash-away water-soluble stabilizer.

This stabilizer is highly recommended because it removes cleanly after embroidery without leaving stiff backing behind.

Many embroiderers prefer wash-away stabilizer for coaster projects because it produces a softer finished result.


Step 7 โ€“ Stitch the Placement Line – Baby Lock Altair : Halloween Coaster Tutorial

Stitch the Placement Line - Baby Lock Altair : Halloween Coaster Tutorial

Begin stitching.

The first stitch is your placement stitch.

This simply outlines where the coaster will be created.

Once completed, leave the hoop in the machine.


Step 8 โ€“ Add the Batting and Fabric – Baby Lock Altair : Halloween Coaster Tutorial

Add the Batting and Fabric - Baby Lock Altair : Halloween Coaster Tutorial

Cut a piece of batting slightly larger than the placement stitch.

Lay it over the stitched outline.

Next, place your main Halloween fabric on top.

Use masking tape to hold everything securely in position.

Run the tack down stitch.

This secures both the batting and fabric before decorative stitching begins.


Step 9 โ€“ Stitch the Meander Background – Baby Lock Altair : Halloween Coaster Tutorial

Stitch the Meander Background - Baby Lock Altair : Halloween Coaster Tutorial

Once the tack down stitch finishes, your Baby Lock Altair will stitch the decorative meander fill.

Watch as the background gradually fills the coaster, adding wonderful texture and depth.

The meander pattern creates a professional quilted appearance without requiring free-motion quilting.


Step 10 โ€“ Stitch the Halloween Cauldron – Baby Lock Altair : Halloween Coaster Tutorial

The machine now stitches the Halloween cauldron design.

Some sections use black thread while other details stitch in white.

Allow the embroidery machine to complete every colour change before continuing.

This is where your coaster really starts to come to life.


Step 11 โ€“ Add the Back Fabric – Baby Lock Altair : Halloween Coaster Tutorial

Add the Back Fabric - Baby Lock Altair : Halloween Coaster Tutorial

Remove the hoop from the embroidery machine.

Do not remove the project from the hoop.

Place your backing fabric over the reverse side.

Secure it with masking tape.

Return the hoop to the embroidery machine.

Run the second tack down stitch.

This joins both the front and back fabrics together.


Step 12 โ€“ Trim the Excess Fabric – Baby Lock Altair : Halloween Coaster Tutorial

Remove the hoop once again.

Leave the project hooped.

Using embroidery scissors, carefully trim away all excess fabric and batting.

Be careful not to cut through any stitching.

Once trimmed, return the hoop to the embroidery machine.


Step 13 โ€“ Stitch the Satin Border – Baby Lock Altair : Halloween Coaster Tutorial

Stitch the Satin Border - Baby Lock Altair : Halloween Coaster Tutorial

The final embroidery step is stitching the satin border.

This satin stitch neatly encloses all the raw fabric edges.

It gives your coaster a polished, professional finish while securing every layer together.


Step 14 โ€“ Wash Away the Stabilizer -Baby Lock Altair : Halloween Coaster Tutorial

Remove the completed coaster from the hoop.

Trim away the excess stabilizer, leaving a small amount close to the stitches.

Using warm water and your fingertips, gently rub the remaining stabilizer.

The wash-away stabilizer dissolves easily, leaving a soft embroidered coaster with no visible backing.


Tips for Success – Baby Lock Altair : Halloween Coaster Tutorial

Tips for Success - Baby Lock Altair : Halloween Coaster Tutorial

Use Wash-Away Stabilizer

Wash-away stabilizer is one of the best choices for this type of in-the-hoop embroidery project. It removes easily with warm water and leaves your finished coaster feeling soft and flexible instead of stiff. Because the stabilizer dissolves away, your coaster has a cleaner, more professional finish without bulky backing showing around the edges.

Secure Fabric with Masking Tape

Masking tape is a simple but effective way to hold your batting and fabric securely in place while stitching. It helps prevent the layers from shifting as the embroidery machine moves around the design. Be sure to place the tape outside the stitching area so your embroidery needle won’t sew through it. Taking a few extra seconds to tape everything down can make a big difference to the final result.

Always Press Set

Whenever you adjust stitch settings in IQ Designer, remember to press Set before moving on to the next screen. This is one of the easiest steps to forget, especially if you’re concentrating on changing stitch widths or colours. If you don’t press Set, your adjustments won’t be saved, and you’ll have to go back and repeat the process. Developing this habit will save you both time and frustration.

Save Frequently

Save every stage into both IQ Designer memory and embroidery memory. Doing this means you can quickly reopen each design element if you want to make another coaster in the future. It also provides peace of mind in case you accidentally exit the project before it’s complete.

Test Your Thread Colours

Before stitching your final coaster, consider stitching a sample on a scrap piece of fabric. Testing your thread colours allows you to see how they look against your chosen Halloween fabric before committing to the final project. Small colour changes can dramatically improve the finished design and make details like the cauldron stand out.

Choose High-Quality Fabric

For the best embroidery results, use good-quality quilting cotton that has been pressed flat before hooping. Wrinkled or loosely woven fabrics can affect stitch quality and cause puckering. A well-pressed fabric provides a smooth surface for the embroidery and helps your finished coaster look crisp and professional.

Trim Carefully

When trimming away the excess fabric after the tack-down stitch, use sharp embroidery scissors and work slowly around the edges. Take care not to nick the stitches, as even a small cut can weaken the satin border. Leaving a tiny margin before the final satin stitch helps ensure the border fully covers the raw fabric edges.

Make a Matching Set

Once you’ve completed your first coaster, don’t stop at just one! Try creating a complete set using different Halloween fabrics or thread colours. You could even swap the cauldron for other spooky embroidery designs, such as pumpkins, ghosts, witches’ hats, black cats, or bats. A coordinated set makes a wonderful seasonal decoration and also makes a thoughtful handmade gift for family and friends.


Why You’ll Love This Project – Baby Lock Altair Halloween Coaster Tutorial

Baby Lock Altair Halloween Coaster Tutorial

This Baby Lock Altair : Halloween Coaster Tutorial is ideal for using fabric scraps while learning more about IQ Designer.

It’s quick to stitch, beginner friendly, and makes wonderful seasonal decorations.

You can easily customize your coaster using different Halloween fabrics, thread colours, or embroidery designs.

Once you’ve completed one coaster, it’s easy to create an entire matching Halloween set.

One of the best things about this project is how little fabric it requires, making it perfect for using up leftover quilting cotton and batting that might otherwise go to waste.

If you enjoy creating seasonal decorations, these embroidered coasters are a fun way to add a handmade touch to your coffee table, dining table, or Halloween party dรฉcor. They also make thoughtful gifts for friends, family, teachers, or anyone who loves Halloween.

This project is an excellent opportunity to become more confident using the powerful features of IQ Designer on the Baby Lock Altair. As you follow the tutorial, you’ll gain experience creating custom shapes, adding decorative fills, saving designs to memory, and combining multiple embroidery elements into one finished project.

These are valuable skills that you can apply to many future embroidery projects.

Because the coaster stitches out fairly quickly, it’s easy to make several in an afternoon. Try creating a matching collection featuring different Halloween colours or embroidery motifs, such as pumpkins, ghosts, bats, or black cats, to build a coordinated set you’ll enjoy displaying year after year.


Final Thoughts -Baby Lock Altair : Halloween Coaster Tutorial

This Baby Lock Altair : Halloween Coaster Tutorial is a fantastic project for anyone wanting to improve their embroidery skills while creating festive Halloween home dรฉcor. By combining IQ Designer with built-in embroidery designs, you’ll learn valuable techniques including creating placement stitches, decorative fills, tack down stitches, and satin borders. Whether you’re making one coaster or a complete Halloween collection, this Baby Lock Altair : Halloween Coaster Tutorial is enjoyable, practical, and rewarding.

If you enjoyed this Baby Lock Altair : Halloween Coaster Tutorial, be sure to explore more Baby Lock Altair embroidery tutorials here on Faodail Creation. Don’t forget to subscribe to my YouTube channel, leave a comment, and share your finished Halloween coaster I love seeing your creative projects!

Read this next : Halloween Wall Hanging Tutorial using Baby Lock Altair โ€“ Amazing Step-by-Step Embroidery Guide for Beginners https://faodailcreation.ca/2026/07/03/halloween-wall-hanging-tutorial-using-baby-lock-altair/

Baby Lock Altair Tutorials, embroidery

How to Use Procreate with IQ Designer | Baby Lock Altair Tutorials

This is the link to the you tube tutorial https://youtu.be/9XD5xUSAGHo

Cassie Cartmell – Faodail Creation

Table of Contents

How to Use Procreate with IQ Designer – How to Use Procreate with IQ Designer

Baby Lock Educator Cassie Cartmell

Have you ever wanted to turn your own drawings into beautiful embroidery designs? Learning How to Use Procreate with IQ Designer makes it easier than ever to transform simple sketches into custom embroidery files using your Baby Lock Altair 2 embroidery machine.

As a Baby Lock Educator Cassie Cartmell, I love showing sewists and embroiderers how to turn their creative ideas into finished projects. In this step-by-step tutorial, Baby Lock Educator Cassie Cartmell walks you through the process of creating clean artwork in Procreate, transferring it to your embroidery machine, and stitching out a unique design.

Whether you’re creating simple shapes, handwritten lettering, or detailed artwork, this technique opens up endless creative possibilities. With guidance from Baby Lock Educator Cassie Cartmell, you’ll learn how Procreate and IQ Designer can work together to help you create custom embroidery designs that reflect your own creativity.

If you’re new to IQ Designer or Procreate, don’t worry. This beginner-friendly guide from Baby Lock Educator Cassie Cartmell walks you through every step, making it easier to understand the process and start creating your own custom embroidery designs.


Why Learn How to Use Procreate with IQ Designer?

Why Learn How to Use Procreate with IQ Designer

One of the biggest advantages of How to Use Procreate with IQ Designer is that you are no longer limited to built-in embroidery designs.

Instead, you can create completely original artwork and stitch it onto quilts, bags, clothing, cushions, wall hangings, and gifts.

Some of the benefits include:

  • Create one-of-a-kind embroidery
  • Digitize your own artwork
  • Draw directly on your iPad
  • Save time tracing designs
  • Easily resize designs inside IQ Designer
  • Great for beginners and experienced embroiderers

Once you learn this workflow, you’ll discover countless ways to personalize your embroidery projects.


What You’ll Need – How to Use Procreate with IQ Designer

What You'll Need - How to Use Procreate with IQ Designer

Before starting, gather the following supplies:

Embroidery Supplies

  • Baby Lock Altair 2 Embroidery Machine
  • IQ Designer
  • iPad
  • Apple Pencil
  • Procreate App
  • USB Flash Drive
  • Computer
  • Fabric
  • Stabilizer
  • Embroidery Thread

Using an Apple Pencil isn’t required, but it gives you much better precision when tracing artwork.


Step 1: Photograph Your Artwork – How to Use Procreate with IQ Designer

Photograph Your Artwork - How to Use Procreate with IQ Designer

The first step in How to Use Procreate with IQ Designer is creating your artwork.

For this tutorial, Cassie simply drew a heart on paper.

You can also:

  • Draw flowers
  • Create simple animals
  • Sketch lettering
  • Draw quilt motifs
  • Create appliquรฉ outlines

Once you’ve finished your drawing, take a clear photograph using your iPad.

Good lighting helps create a cleaner image and makes tracing much easier later.


Step 2: Import the Photo into Procreate – How to Use Procreate with IQ Designer

Import the Photo into Procreate - How to Use Procreate with IQ Designer

Open Procreate on your iPad.

Most of the time Procreate opens directly to the Gallery.

Tap the + button to create a new canvas.

Choose a canvas size that suits your project. Cassie often creates custom canvases sized to match embroidery hoops such as:

  • 4 x 4
  • 5 x 7
  • 9 x 14

For this demonstration, a simple square canvas works perfectly.

Next:

  • Tap the Actions menu (the wrench icon)
  • Select Insert a Photo
  • Choose the picture you just took

Your artwork now appears on your canvas.


Step 3: Reduce the Opacity – How to Use Procreate with IQ Designer

One of the best tricks when learning How to Use Procreate with IQ Designer is lowering the opacity of the original photograph.

Open the Layers panel.

You’ll see:

  • Background Layer
  • Photo Layer

Tap the “N” beside the photo layer.

Move the opacity slider down until the original drawing becomes faint.

This allows you to clearly see your new lines while tracing.


Step 4: Create a New Drawing Layer – How to Use Procreate with IQ Designer

Create a New Drawing Layer - How to Use Procreate with IQ Designer

Never draw directly on your original photograph.

Instead:

  • Create a brand-new layer
  • Keep your tracing separate
  • Leave your original image untouched

Working in layers gives you complete flexibility if you need to make corrections later.

Professional digital artists almost always work this way.


Step 5: Choose the Right Brush – How to Use Procreate with IQ Designer

Select the Brush tool.

Navigate to:

Brush Library โ†’ Basics โ†’ Jagged

This brush creates a solid, clean line that’s ideal for embroidery tracing.

Using a smooth line helps create better stitch paths later inside IQ Designer.


Step 6: Trace Your Artwork Carefully – How to Use Procreate with IQ Designer

Trace Your Artwork Carefully - How to Use Procreate with IQ Designer

Now the fun begins.

Zoom into your artwork using two fingers.

Rotate your iPad if necessary so your hand moves naturally while drawing.

Begin tracing your image slowly.

Don’t worry if your first attempt isn’t perfect.

The beauty of digital drawing is that mistakes are easy to fix.

If you make an error:

  • Tap with two fingers to Undo
  • Tap with three fingers to Redo

These simple shortcuts can save a tremendous amount of time.


Step 7: Fix Any Mistakes – How to Use Procreate with IQ Designer

Fix Any Mistakes - How to Use Procreate with IQ Designer

If you accidentally delete your drawing layer, don’t panic.

Simply create another layer and continue tracing.

Cassie experienced exactly this while creating her heart design.

It’s a great reminder that even experienced users occasionally make mistakes.

The important thing is understanding how layers work.

Once your drawing layer is restored, continue tracing your artwork.


Step 8: Clean Up Your Lines – How to Use Procreate with IQ Designer

As you continue learning How to Use Procreate with IQ Designer, you’ll notice that smoother lines produce better embroidery.

Avoid jagged edges wherever possible.

Instead of trying to draw everything in one stroke:

  • Draw a small section
  • Zoom in
  • Continue from where you left off
  • Connect your lines smoothly

This produces much cleaner embroidery results.

If needed, switch to the Eraser tool.

Use the same brush profile for erasing to maintain consistent line quality.

You can also adjust your brush size depending on the level of detail you’re cleaning up.

Once you’re satisfied with your tracing, switch back to the Brush tool and make any final adjustments.

In the next section, you’ll learn how to export your artwork from Procreate, import it into IQ Designer on the Baby Lock Altair 2, convert it into embroidery stitches, customize stitch settings, and stitch out your finished design.

Export Your Artwork from Procreate – How to Use Procreate with IQ Designer

Export Your Artwork from Procreate - How to Use Procreate with IQ Designer

Once you’re happy with your traced design, it’s time to prepare it for your embroidery machine.

Before exporting, remove the original reference photograph.

Open the Layers panel and locate the photo layer. Swipe left on the layer and tap Delete. You should now only see your clean line drawing.

This is an important step when learning How to Use Procreate with IQ Designer because removing the original image ensures IQ Designer imports only your finished artwork instead of unnecessary background details.

Next, tap the Actions menu (the wrench icon).

Choose Share and then select JPEG.

Procreate gives you several sharing options, but JPEG works perfectly for importing into IQ Designer.

Save the JPEG to your preferred cloud storage, such as Google Drive, making it easy to access from your computer.


Download the Artwork to Your Computer – How to Use Procreate with IQ Designer

Open Google Drive on your computer.

Locate the artwork you just uploaded.

Download the JPEG and save it to your computer’s Downloads folder or directly onto your desktop.

Rename the file something meaningful, such as:

  • Heart
  • Flower
  • Butterfly
  • Quilt Block

Giving your artwork a clear name makes it much easier to find later, especially as your design collection grows.

Once renamed, copy the JPEG onto a USB flash drive.

Your artwork is now ready to transfer to your embroidery machine.


Import the Artwork into IQ Designer – How to Use Procreate with IQ Designer

Import the Artwork into IQ Designer - How to Use Procreate with IQ Designer

Now it’s time for the exciting part of How to Use Procreate with IQ Designer.

Insert your USB stick into your Baby Lock Altair 2 embroidery machine.

From the home screen, select IQ Designer.

Choose Line Design since your artwork is a line drawing.

Next:

  1. Open the USB drive.
  2. Locate your JPEG.
  3. Select the artwork.
  4. Press Set.

IQ Designer imports the drawing and prepares it for editing.

If your lines are clean, you’ll immediately notice how crisp the imported design looks.

One advantage of tracing in Procreate instead of importing a pencil sketch directly is that digital lines reduce unwanted “noise” and produce much cleaner embroidery designs.


Adjust Your Design Inside IQ Designer – How to Use Procreate with IQ Designer

After importing the artwork, you’ll see your traced design displayed on the screen.

From here you can make several adjustments before converting it into stitches.

You can:

  • Resize the artwork
  • Make it larger or smaller
  • Reposition it
  • Preview how it will stitch

You’ll also notice a background image.

This is simply the original guide image that IQ Designer used during conversion.

If you find it distracting, reduce or hide the background so only the stitch outline remains visible.

Viewing only the embroidery lines makes it much easier to check for smooth curves and clean corners.


Choose Your Stitch Type – How to Use Procreate with IQ Designer

One of the biggest advantages of How to Use Procreate with IQ Designer is the flexibility to choose different stitch styles.

Instead of being locked into one stitch type, IQ Designer lets you customize your embroidery.

Popular options include:

Straight Stitch

Perfect for simple artwork, outlines, signatures and hand-drawn illustrations.

Satin Stitch

Ideal for bold outlines that stand out on fabric.

Satin stitches create a raised embroidered look and work beautifully on appliquรฉ projects.

Zigzag Stitch

Great for decorative effects and wider outlines.

If you accidentally select the wrong stitch style, don’t worry.

Simply return to the stitch settings and choose another option before saving your design.


Fill Closed Shapes – How to Use Procreate with IQ Designer

Fill Closed Shapes - How to Use Procreate with IQ Designer

Because Cassie’s heart is a closed shape, IQ Designer can also fill the inside.

Select the Fill option.

Tap inside the heart.

The machine automatically fills the enclosed area.

This feature works wonderfully for:

  • Hearts
  • Flowers
  • Stars
  • Leaves
  • Simple animals
  • Quilt motifs

Experiment with different fill patterns to create unique embroidery designs.


Fine-Tune the Stitch Settings – How to Use Procreate with IQ Designer

Before stitching, take a few moments to adjust the embroidery settings.

You can customize:

Stitch Width

Increase or decrease the stitch width depending on the effect you’re after.

Stitch Length (Run Pitch)

Adjust the spacing between stitches.

Longer stitches create a lighter design, while shorter stitches produce a denser, more detailed finish.

Thread Colour

Preview your design using different thread colours before stitching.

These adjustments allow you to personalise every project without needing separate digitizing software.


Save Your Design

Once you’re happy with the settings, save your design.

Press Memory to store the file inside your Baby Lock Altair 2.

The machine converts your artwork into embroidery stitches.

You’ll now see the finished embroidery design in the embroidery screen, ready to stitch.

This is one of the most rewarding moments when learning How to Use Procreate with IQ Designer watching your own drawing become a stitched design.


Stitch Out Your Embroidery Design – How to Use Procreate with IQ Designer

Stitch Out Your Embroidery Design - How to Use Procreate with IQ Designer

Hoop your stabilizer and fabric as you normally would.

Thread your machine.

Load your saved design.

Before pressing Start, preview the embroidery one final time to ensure everything looks correct.

As the machine begins stitching, you’ll see your digital drawing come to life.

Cassie’s simple hand-drawn heart stitched beautifully, demonstrating how easy it is to create custom embroidery from original artwork.

Once you master this technique, you can create much more detailed designs.

In Cassie’s example, she also traced a portrait of Taylor, proving that How to Use Procreate with IQ Designer can be used for far more than basic shapes.


Tips for Better Results – How to Use Procreate with IQ Designer

Use an Apple Pencil

Although you can draw with your finger, an Apple Pencil provides greater accuracy and smoother lines.

Keep Lines Clean

Smooth lines produce smoother embroidery.

Avoid unnecessary bumps and jagged edges whenever possible.

Zoom In Frequently

Working close-up helps produce cleaner curves and more professional-looking designs.

Work in Layers

Never trace directly onto your original photograph.

Separate layers make editing much easier.

Save Often

Save your Procreate project as you work so you never lose your progress.


Frequently Asked Questions – How to Use Procreate with IQ Designer

Frequently Asked Questions - How to Use Procreate with IQ Designer

Can I use any drawing in Procreate?

Yes. You can trace simple sketches, children’s drawings, lettering, logos (that you own), quilt motifs and original artwork.

Does IQ Designer work with JPEG images?

Yes. JPEG images imported through a USB drive work very well, especially when they contain clean, high-contrast line art.

Is an Apple Pencil required?

No, but it makes drawing much easier and improves precision considerably.

Can I resize my artwork after importing it?

Absolutely. IQ Designer allows you to resize your artwork before converting it into embroidery stitches.

Which embroidery machine is shown in this tutorial?

Cassie demonstrates the process on the Baby Lock Altair 2, although similar features are available on compatible Baby Lock machines with IQ Designer.

Final Thoughts on How to Use Procreate with IQ Designer

Learning How to Use Procreate with IQ Designer opens up a whole new world of creativity. Instead of relying solely on built-in embroidery designs, you can transform your own sketches, illustrations and artwork into unique stitched creations.

By combining Procreate’s powerful drawing tools with the flexibility of IQ Designer, you’ll be able to personalise quilts, bags, cushions, clothing and gifts with designs that are truly your own.

Whether you’re tracing a simple heart like Cassie or creating a detailed portrait, the workflow is surprisingly straightforward and incredibly rewarding. The more you practise, the more confident you’ll become at turning your ideas into beautiful embroidery.

If you enjoyed learning How to Use Procreate with IQ Designer, be sure to explore more Baby Lock Altair 2 tutorials here on Faodail Creation. You’ll find step-by-step embroidery, quilting and sewing projects designed to help you get the most from your machine while building your skills one project at a time.

Read this next – Halloween Wall Hanging Tutorial using Baby Lock Altair โ€“ Amazing Step-by-Step Embroidery Guide for Beginners https://faodailcreation.ca/2026/07/03/halloween-wall-hanging-tutorial-using-baby-lock-altair/

Frankenstein Monster Applique : Easy & Fun Halloween Sewing Tutorial
This YouTube tutorial by Cassie Cartmell guides you through creating a Frankenstein …
How to Sew a Cord Keeper | Sewing Machine Tutorials & Tips for Beginners
This YouTube tutorial by Cassie Cartmell demonstrates how to sew a cord …
Baby Lock Altair Tutorials, embroidery

Halloween Wall Hanging Tutorial | Baby Lock Altair Tutorials

Cassie Cartmell – Faodail Creation

Table of Contents

Halloween Wall Hanging Tutorial using Baby Lock Altair
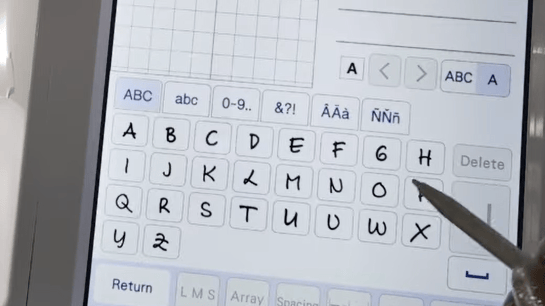
Halloween Wall Hanging Tutorial using Baby Lock Altair โ€“ Amazing Step-by-Step Embroidery Guide for Beginners

If you’re looking for a fun embroidery project for the spooky season, this Halloween Wall Hanging Tutorial using Baby Lock Altair is the perfect place to start. As Baby Lock Educator Cassie Cartmell, I’m excited to share the techniques I use to create professional-looking embroidery projects using the amazing features built into the Baby Lock Altair.

In this tutorial, you’ll learn how to create a beautiful Halloween wall hanging entirely on your Baby Lock Altair using IQ Designer, embroidery designs, appliquรฉ techniques, custom lettering, and decorative finishing. Baby Lock Educator Cassie Cartmell will guide you through each step, from designing the layout on the machine to stitching and finishing your project, so you can confidently recreate it yourself.

Whether you’re new to machine embroidery or have years of experience, this project is easy to customize and is a fantastic way to decorate your home for Halloween. Along the way, I’ll share helpful tips and techniques that I’ve learned as a Baby Lock Educator Cassie Cartmell, including creating appliquรฉ backgrounds, resizing embroidery designs correctly with stitch recalculation, and adding professional finishing touches like grommets for easy hanging.

As Baby Lock Educator Cassie Cartmell, I love showing how the Baby Lock Altair can be used to combine embroidery, appliquรฉ, lettering, and creative design features into one unique project. This Halloween wall hanging is a fun way to explore IQ Designer while creating a seasonal decoration you can enjoy year after year.


Why Make a Halloween Wall Hanging Using Baby Lock Altair? – Halloween Wall Hanging Tutorial using Baby Lock Altair

Why Make a Halloween Wall Hanging Using Baby Lock Altair? - Halloween Wall Hanging Tutorial using Baby Lock Altair

Creating seasonal decorations with your embroidery machine is a wonderful way to personalize your home. This Halloween Wall Hanging Tutorial using Baby Lock Altair combines embroidery, appliquรฉ, and custom lettering into one enjoyable project.

Some of the benefits include:

  • Create unique Halloween decorations.
  • Practice using IQ Designer.
  • Learn appliquรฉ techniques.
  • Customize your own Halloween sayings.
  • Improve your embroidery skills.
  • Make thoughtful handmade gifts.

Because the Baby Lock Altair offers advanced editing features directly on the machine, you can design and stitch your project without needing additional embroidery software.

Baby Lock Educator Tip – Halloween Wall Hanging Tutorial using Baby Lock Altair

As a Baby Lock Educator, one of my favorite features of the Baby Lock Altair is IQ Designer. I always recommend saving your project at each major editing stage after creating your base shape, after importing embroidery designs, and again after adding lettering.

Saving multiple versions means you can easily go back and make changes without having to recreate your entire design, making the creative process much more enjoyable and stress-free.


Supplies for the Halloween Wall Hanging Tutorial using Baby Lock Altair – Halloween Wall Hanging Tutorial using Baby Lock Altair

Supplies for the Halloween Wall Hanging Tutorial using Baby Lock Altair - Halloween Wall Hanging Tutorial using Baby Lock Altair

Before you begin, gather your supplies.

Fabric

Choose Halloween-themed cotton fabric for the front of your wall hanging. Select a coordinating fabric for the backing to create a neat and professional finish.

Stabilizer

A wash-away stabilizer works perfectly for this project because it provides support during stitching while removing cleanly once the embroidery is complete.

Thread

Use high-quality embroidery thread throughout the design. When stitching the final satin border, use the same thread in both the top and bobbin for the cleanest results.

Baby Lock Educator Tip – Halloween Wall Hanging Tutorial using Baby Lock Altair

As a Baby Lock Educator, I always recommend preparing a โ€œproject stationโ€ before starting any embroidery design. Lay out your machine, threads, stabilizer, and tools in the order youโ€™ll use them. This small step reduces mistakes, saves time during stitching, and helps you stay focused while working through your Halloween Wall Hanging Tutorial using Baby Lock Altair. Keeping everything organized also makes it easier to enjoy the creative process without interruptions.

Additional Supplies

You’ll also need:

  • Baby Lock Altair embroidery machine
  • Embroidery hoop
  • USB drive
  • Wash-away stabilizer
  • Fabric scissors
  • Masking tape
  • Seam ripper
  • Grommet kit
  • Hammer
  • Ribbon for hanging

Setting Up the Design in IQ Designer – Halloween Wall Hanging Tutorial using Baby Lock Altair

Setting Up the Design in IQ Designer - Halloween Wall Hanging Tutorial using Baby Lock Altair

One of the best features of this Halloween Wall Hanging Tutorial using Baby Lock Altair is learning how to create the base design directly inside IQ Designer.

Create the Rectangle

Start by opening IQ Designer.

Insert a rectangle shape and resize it to approximately:

  • 10 inches wide
  • 6 inches high

This rectangle becomes the finished size of your Halloween wall hanging.

After sizing the rectangle, change it to a satin stitch border.

Increase the stitch width to create a bold frame around your design and adjust the stitch density to make the satin stitches slightly tighter for better coverage.

Once you’re happy with the settings, save the design into IQ Designer memory before sending it to the embroidery side of the machine.


Import the Decorative Arrow Design – Halloween Wall Hanging Tutorial using Baby Lock Altair

Import the Decorative Arrow Design - Halloween Wall Hanging Tutorial using Baby Lock Altair

The next step is importing the decorative double-ended arrow from your USB drive.

Resize the arrow until it fits nicely within your rectangle.

Reduce unnecessary colors if your design contains multiple thread changes. Fewer color stops help the embroidery process run more smoothly.

Save the edited arrow into IQ Designer memory so it can easily be combined with the rest of the project later.

Baby Lock Educator Tip

As a Baby Lock Educator, I recommend always simplifying imported designs before saving them into memory. Removing extra thread colors and unnecessary details not only speeds up stitching time but also improves design clarity. On projects like this Halloween Wall Hanging Tutorial using Baby Lock Altair, cleaner designs help each element like arrows, lettering, and appliquรฉ stand out more professionally once stitched.


Add the Witch Embroidery Design – Halloween Wall Hanging Tutorial using Baby Lock Altair

Add the Witch Embroidery Design - Halloween Wall Hanging Tutorial using Baby Lock Altair

Now it’s time to add the Halloween focal point.

Browse your built-in celebration designs and choose one of the witch embroidery designs included with the Baby Lock Altair.

Resize the embroidery using stitch recalculation rather than simply stretching the design. This keeps the stitch quality looking clean and professional.

Position the witch toward the lower portion of the wall hanging, leaving room above for lettering.

You can also adjust the outline spacing if you’d like the embroidery to have a slightly bolder appearance.


Creating the Appliquรฉ Background – Halloween Wall Hanging Tutorial using Baby Lock Altair

Creating the Appliquรฉ Background - Halloween Wall Hanging Tutorial using Baby Lock Altair

A feature many embroiderers overlook is using IQ Designer to create custom appliquรฉ pieces.

In this Halloween Wall Hanging Tutorial using Baby Lock Altair, the orange background behind the witch is created entirely inside IQ Designer.

Import the Witch Shape

Open IQ Designer again.

Load the witch outline and place a selection box around it.

Move the embroidery shape into position before adding a fill stitch.

Add a Fill Stitch

Select the Fill Bucket tool.

Choose an orange fill pattern and apply it to the background area.

Remove the unnecessary outline so only the filled appliquรฉ section remains.

This creates a beautiful orange background that makes the witch stand out while adding depth to the finished wall hanging.

Adjust the stitch settings if necessary before saving the design into memory.

Baby Lock Educator Tip – Halloween Wall Hanging Tutorial using Baby Lock Altair

As a Baby Lock Educator, I recommend always testing your fill stitch density before committing to the final design. On appliquรฉ-heavy projects like this Halloween Wall Hanging Tutorial using Baby Lock Altair, slightly tightening the fill can improve coverage and reduce gaps, giving your finished embroidery a smoother and more polished appearance.


Building the Complete Embroidery Design – Halloween Wall Hanging Tutorial using Baby Lock Altair

Building the Complete Embroidery Design - Halloween Wall Hanging Tutorial using Baby Lock Altair

With all of your individual pieces created, it’s time to assemble the entire project.

Your stitch order should include:

  1. Placement stitch
  2. Tack-down stitch
  3. Background fill stitch
  4. Witch embroidery
  5. Decorative lettering
  6. Arrow embellishments
  7. Final satin border

Planning the stitch order correctly helps the project stitch smoothly from beginning to end.


Adding Personalized Halloween Lettering – Halloween Wall Hanging Tutorial using Baby Lock Altair

Adding Personalized Halloween Lettering - Halloween Wall Hanging Tutorial using Baby Lock Altair

One of the most enjoyable parts of this Halloween Wall Hanging Tutorial using Baby Lock Altair is creating custom text.

The project features the fun Halloween saying:

Parking Only

Followed by:

All Others

And finally:

Will Be Toad

The playful spelling adds personality and gives the finished sign a whimsical Halloween theme.

Experiment with different fonts, resize the lettering to balance your design, and position each line until you’re happy with the overall layout.

Because all editing is done directly on the Baby Lock Altair, it’s easy to move text, resize it, and preview the finished project before stitching.


Preparing the Fabric for Stitching – Halloween Wall Hanging Tutorial using Baby Lock Altair

Preparing the Fabric for Stitching - Halloween Wall Hanging Tutorial using Baby Lock Altair

Once your embroidery file is complete, hoop your wash-away stabilizer securely.

Rather than hooping the fabric itself, float your fabric over the stabilizer.

Many embroiderers prefer this method because it helps prevent hoop marks while still providing excellent stitch quality.

Use small pieces of masking tape around the edges to keep the fabric from shifting during embroidery.

Floating fabric works especially well when creating decorative wall hangings like this project.

Baby Lock Educator Tip – Halloween Wall Hanging Tutorial using Baby Lock Altair

As a Baby Lock Educator, I always recommend doing a quick โ€œfinger press testโ€ before starting your machine. Lightly run your hand over the floating fabric to ensure there are no ripples or loose areas. Even small wrinkles can affect stitch quality in detailed projects like this Halloween Wall Hanging Tutorial using Baby Lock Altair, so taking a few extra seconds here helps ensure smooth, consistent embroidery results.

Stitching the Halloween Wall Hanging Tutorial using Baby Lock Altair

Once your fabric is secured and your design is loaded, you’re ready to begin stitching your Halloween Wall Hanging Tutorial using Baby Lock Altair. Taking your time during each stage helps ensure crisp embroidery and a professional-looking finished project.

Stitch the Placement Stitch

The first stitch sequence is the placement stitch.

This stitch outlines exactly where your appliquรฉ fabric will be placed. Carefully watch the machine complete this outline before laying your Halloween fabric over the marked area.

Smooth the fabric so there are no wrinkles or folds.

Stitch the Tack-Down Stitch

Next, allow the Baby Lock Altair to stitch the tack-down line.

This secures the fabric firmly to the stabilizer before the decorative stitching begins.

Once the tack-down stitch is complete, carefully trim away the excess fabric close to the stitching line. Sharp embroidery scissors make this step much easier and help create clean appliquรฉ edges.

Stitch the Background Fill

Now the machine begins stitching the orange background fill that was created in IQ Designer.

This fill gives the witch embroidery a bright Halloween backdrop and adds extra dimension to the finished wall hanging.

Take a moment to admire how the fill transforms the project before the decorative embroidery begins.


Stitching the Witch Design – Halloween Wall Hanging Tutorial using Baby Lock Altair

Stitching the Witch Design - Halloween Wall Hanging Tutorial using Baby Lock Altair

With the appliquรฉ background complete, the Baby Lock Altair automatically continues stitching the witch embroidery.

The built-in Halloween designs stitch beautifully and include plenty of decorative details.

As the embroidery progresses, monitor your thread colors and make thread changes whenever prompted.

The Baby Lock Altair makes color changes easy, allowing you to create a detailed embroidery design with very little effort.


Stitching the Decorative Lettering – Halloween Wall Hanging Tutorial using Baby Lock Altair

Stitching the Decorative Lettering - Halloween Wall Hanging Tutorial using Baby Lock Altair

After the witch design has finished, the embroidery machine moves on to the lettering.

The phrase:

  • Parking Only
  • All Others
  • Will Be Toad

creates a humorous Halloween sign that is sure to make visitors smile.

Take your time positioning your lettering before stitching. Even small adjustments can greatly improve the balance of your finished design.

One advantage of this Halloween Wall Hanging Tutorial using Baby Lock Altair is that you can easily personalize the wording.

Some fun alternatives include:

  • Witch Parking Only
  • Enter If You Dare
  • Happy Halloween
  • Beware
  • Haunted House
  • Welcome, Foolish Mortals
  • Boo Crew
  • Trick or Treat

Personalizing your embroidery makes every wall hanging completely unique.


Adding the Decorative Arrow – Halloween Wall Hanging Tutorial using Baby Lock Altair

Adding the Decorative Arrow - Halloween Wall Hanging Tutorial using Baby Lock Altair

The decorative double-ended arrow adds another layer of visual interest.

Because it was resized earlier in IQ Designer, it fits perfectly within the overall layout.

Small decorative elements like arrows help guide the eye across the finished embroidery while adding balance to the design.

If you prefer, you can substitute other Halloween embellishments such as:

  • Bats
  • Pumpkins
  • Black cats
  • Ghosts
  • Spider webs
  • Stars
  • Moons

The Baby Lock Altair makes it easy to combine multiple embroidery designs into one custom project.


Finishing the Back of Your Halloween Wall Hanging – Halloween Wall Hanging Tutorial using Baby Lock Altair

After the embroidery is complete, remove the hoop from the machine.

Do not remove the project from the stabilizer just yet.

Instead, place your backing fabric on the reverse side of the embroidered piece.

Return the project to the embroidery machine so it can stitch the backing fabric securely in place.

This creates a clean finish without requiring additional sewing.


Stitch the Final Satin Border – Halloween Wall Hanging Tutorial using Baby Lock Altair

The last embroidery step is the satin stitch border.

This decorative edge finishes the project while securely joining the front and back fabrics together.

For the best results:

  • Use matching embroidery thread.
  • Use the same thread in your bobbin.
  • Check thread tension before stitching.
  • Allow the machine to complete the border without interruption.

A satin border gives the wall hanging a polished appearance and helps prevent fraying over time.


Trim the Project

Once the satin border is complete, remove the embroidery from the hoop.

Trim away the excess front fabric, backing fabric, and stabilizer, leaving a small margin outside the satin stitch.

Take your time during trimming to avoid accidentally cutting the embroidery.

Sharp appliquรฉ scissors are especially useful around curves and corners.


Remove the Wash-Away Stabilizer – Halloween Wall Hanging Tutorial using Baby Lock Altair

One of the easiest finishing steps in this Halloween Wall Hanging Tutorial using Baby Lock Altair is removing the stabilizer.

Simply dampen your fingers with warm water and gently rub the exposed stabilizer.

It will dissolve quickly, leaving only the beautiful embroidery behind.

Allow the project to dry completely before adding the hanging hardware.


Installing Grommets – Halloween Wall Hanging Tutorial using Baby Lock Altair

Installing Grommets - Halloween Wall Hanging Tutorial using Baby Lock Altair

Adding grommets gives your wall hanging a durable, professional finish.

Mark the Placement

Measure equal distances from each side so the grommets are evenly positioned.

Accurate placement helps the wall hanging hang straight.

Cut the Openings

Use a seam ripper to carefully begin each hole.

Gradually enlarge the opening until the grommet fits comfortably.

Avoid making the hole too large.

Install the Grommets

Insert the front half of the grommet through the opening.

Place the backing piece over it.

Using the included installation tools and a hammer, secure the two pieces together.

Repeat the process for the second grommet.

Once complete, thread decorative ribbon through both grommets to create an attractive hanger.


Tips for Success – Halloween Wall Hanging Tutorial using Baby Lock Altair

Tips for Success - Halloween Wall Hanging Tutorial using Baby Lock Altair

Test Your Thread

Before beginning your final project, stitch a small test design using your chosen thread colors.

Testing helps identify tension issues before stitching your finished wall hanging.

Save Often

While working in IQ Designer, save your work frequently.

Saving multiple versions allows you to return to earlier edits if needed.

Preview Every Step

Always preview your embroidery sequence before stitching.

Checking placement beforehand helps prevent costly mistakes.

Float Carefully

Floating fabric works wonderfully for appliquรฉ projects, but be sure your masking tape holds the fabric securely throughout the embroidery process.

Take Advantage of IQ Designer

IQ Designer is one of the Baby Lock Altair’s most powerful features.

Learning to combine shapes, fills, lettering, and embroidery designs opens endless creative possibilities beyond this Halloween project.

Baby Lock Educator Tip – Halloween Wall Hanging Tutorial using Baby Lock Altair

As a Baby Lock Educator, I always encourage students to experiment inside IQ Designer without fear of โ€œmessing up.โ€ One of the best ways to learn is by duplicating a design and testing small changes like adjusting fill types, resizing shapes, or shifting lettering placement. On projects like this Halloween Wall Hanging Tutorial using Baby Lock Altair, this hands-on exploration builds confidence and helps you understand how each element affects the final stitch-out.


Customize Your Halloween Wall Hanging – Halloween Wall Hanging Tutorial using Baby Lock Altair

This project is easy to personalize.

Consider changing:

  • Fabric colors
  • Thread colors
  • Fonts
  • Decorative motifs
  • Halloween sayings
  • Border shapes
  • Finished size

You could even make matching wall hangings for different holidays throughout the year using the exact same construction method.

Once you’ve completed this Halloween Wall Hanging Tutorial using Baby Lock Altair, you’ll have the confidence to design many more seasonal embroidery decorations using the same techniques.

Read this next : DIY Halloween Key Fob and Baby Lock Altair with Faodail Creation: Amazing Easy Embroidery Project for Halloween https://faodailcreation.ca/2026/06/25/faodail-creation-diy-halloween-key-fob/

Baby Lock Altair Tutorials, embroidery

DIY Halloween Key Fob | Baby Lock Altair Tutorials

Cassie Cartmell – Faodail Creation and Baby Lock Educator Canada

Table of Contents

DIY Halloween Key Fob and Baby Lock Altair with Faodail Creation (Baby Lock Educator)

Baby Lock Educator Cassie Cartmell

his project is all about making your own DIY Halloween Key Fob, allowing you to express yourself creatively and make something special for the season.

As a Baby Lock Educator Cassie Cartmell, I love sharing projects that help embroiderers build confidence while exploring the creative features built into their machines. This DIY Halloween Key Fob is a great introduction to using IQ Designer for creating custom shapes, adding lettering, and incorporating embroidery designs into a single project.

Baby Lock Educator Cassie Cartmell will guide you through the process of creating placement stitches, tack-down stitches, and satin borders while working with materials such as cork and water-soluble stabilizer. Making your own DIY Halloween Key Fob is a fun way to practice embroidery techniques while creating a useful project that can be customized to suit your style.

By the end of this tutorial, you’ll have a durable and festive key fob that showcases your embroidery skills and can easily be customized with different designs, colors, lettering, and seasonal themes. Baby Lock Educator Cassie Cartmell shares techniques that can help you become more comfortable using IQ Designer and creating your own unique embroidery projects.

The DIY Halloween Key Fob is not only a fun project but also a great way to add a personal touch to your Halloween festivities. Whether you’re making one for yourself, creating gifts for friends and family, or experimenting with your own embroidery ideas, this project gives you plenty of opportunities to get creative. Follow along with Baby Lock Educator Cassie Cartmell and create a festive key fob that showcases your unique style and growing embroidery skills.

Why Make a DIY Halloween Fob and Baby Lock Altair with Faodail Creation (Baby Lock Educator)

Why Make a DIY Halloween Key Fob and Baby Lock Altair with Faodail Creation (Baby Lock Educator)

Completing a DIY Halloween Key Fob project is rewarding and adds a personal touch to your Halloween celebrations.

Benefits include:

  • Quick project completion
  • Minimal materials required
  • Great for gifts
  • Excellent craft fair products
  • Perfect for practicing IQ Designer features
  • Easy customization with text and graphics

Baby Lock Educator Tip

When creating key fobs, keep your finished design under 2.5 inches wide. Smaller designs stitch faster and are more durable for everyday use.

Ensure you have everything ready to create your very own Key Fob.

Materials Needed for DIY Halloween Key Fob and Baby Lock Altair with Faodail Creation (Baby Lock Educator)

Materials Needed for Halloween Key Fob and Baby Lock Altair with Faodail Creation (Baby Lock Educator)

Gather the following supplies before starting:

By preparing materials, you can dive straight into making your DIY Halloween Key Fob

Below are my Amazon Affiliate links, if you decide to purchase from these links I may receieve a small commission at no extra cost to you

This is my Amazon Store : https://www.amazon.com/shop/faodailcreation

Gathering the right embroidery supplies will make your Halloween Key Fob creation process smoother.

Embroidery Supplies

Hardware Supplies

Design Files

  • Broomstick embroidery design
  • Custom text design

Baby Lock Educator Tip

Always match your top thread and bobbin thread color before stitching the final satin border for the cleanest professional finish.

Creating the Shape in DIY Halloween Key Fob and Baby Lock Altair with Faodail Creation (Baby Lock Educator)

Creating the Shape in Halloween Key Fob and Baby Lock Altair with Faodail Creation (Baby Lock Educator)

The first step is creating the base shape inside IQ Designer.

Open IQ Designer and select a curved shape. Resize the shape to slightly less than 2.5 inches wide. This creates the perfect size for a key fob while ensuring it fits comfortably within a 4×4 hoop.

After sizing your shape:

  1. Select the bucket tool.
  2. Create a running stitch outline.
  3. Choose your preferred thread color.
  4. Preview the design.
  5. Save it to machine memory.

This first design will become your placement stitch.

Baby Lock Educator Tip

Saving each stage separately allows you to reuse placement, tack-down, and satin border designs for future projects.

Building the Satin Stitch Shape for DIY Halloween Key Fob and Baby Lock Altair with Faodail Creation (Baby Lock Educator)

Building the Satin Stitch Shape for Halloween Key Fob and Baby Lock Altair with Faodail Creation (Baby Lock Educator)

Starting with a solid design is crucial for a successful Halloween Fob.

Once the placement stitch is complete, reopen the shape in IQ Designer.

Convert the interior to a satin-filled design. Increase the density slightly to provide better edge coverage and durability.

After adjusting the settings:

  • Select your satin fill color
  • Increase stitch density
  • Preview the design
  • Save to machine memory

The satin border will become the finishing stitch for your key fob.

Baby Lock Educator Tip

Increasing density slightly helps eliminate gaps when stitching on cork or vinyl materials.

Importing the Broomstick Design for DIY Halloween Key Fob and Baby Lock Altair with Faodail Creation (Baby Lock Educator)

Importing the Broomstick Design for Halloween Key Fob and Baby Lock Altair with Faodail Creation (Baby Lock Educator)

A DIY Halloween Key Fob wouldn’t be complete without a spooky design.

Import the broomstick illustration into IQ Designer. Reduce the color count and remove the background to simplify the embroidery process.

Consider saving different stages of your Halloween Fob designs for future use.

Resize the broomstick to fit comfortably inside your fob shape.

After resizing:

  • Remove unnecessary colors
  • Enable under sewing
  • Adjust pull compensation
  • Increase density if needed
  • Save to machine memory

These adjustments help produce cleaner embroidery results.

Baby Lock Educator Tip

Using under sewing improves stitch stability and prevents shifting when stitching detailed Halloween designs.

Adding Custom Text to DIY Halloween Key Fob and Baby Lock Altair with Faodail Creation (Baby Lock Educator)

Adding Custom Text to Halloween Key Fob and Baby Lock Altair with Faodail Creation (Baby Lock Educator)

Personalized text makes every fob unique.

Add wording using the embroidery text feature. You can use multiple fonts and separate text lines for a creative appearance.

Consider phrases such as:

  • Witch Parking Only
  • Broom Rider
  • Happy Halloween
  • Witch Please
  • Spooky Vibes

Arrange the text around your broomstick design to maximize available space.

Baby Lock Educator Tip – DIY Halloween Key Fob

Use different font styles for each line to create visual interest without overcrowding your design.

Design Assembly for DIY Halloween Key Fob and Baby Lock Altair with Faodail Creation (Baby Lock Educator)

Design Assembly for Halloween Key Fob and Baby Lock Altair with Faodail Creation (Baby Lock Educator)

Don’t forget to include your unique designs on your DIY Halloween Key Fob to showcase your style.

Your Halloween Fob can feature an array of colors to reflect your personality during the spooky season.

Don’t hesitate to add a personal touch to your Halloween Fob with your choice of text.

Now it’s time to assemble the complete embroidery sequence.

Your design order should include:

  1. Placement stitch
  2. Tack-down stitch
  3. Text embroidery
  4. Broomstick embroidery
  5. Second tack-down stitch
  6. Satin border stitch

Keeping the sequence organized ensures professional results and prevents mistakes during stitching.

Double-check sizing before beginning.

Baby Lock Educator Tip

Always preview the entire embroidery sequence before stitching to confirm proper placement and spacing.

Stitching the Halloween Fob and Baby Lock Altair with Faodail Creation (Baby Lock Educator)

Stitching the Halloween Key Fob and Baby Lock Altair with Faodail Creation (Baby Lock Educator)

Hoop a layer of water-soluble stabilizer in your 4×4 hoop.

Begin stitching the placement line.

Once complete:

  • Place cork over the placement stitch
  • Stitch the first tack-down
  • Stitch the wording
  • Stitch the broomstick design

After the embroidery is complete on the front, remove the hoop from the machine.

Baby Lock Educator Tip

Water-soluble stabilizer provides support during stitching while making cleanup simple after completion.

Finishing the Back of Halloween Fob and Baby Lock Altair with Faodail Creation (Baby Lock Educator)

Turn the hoop over and position a second piece of cork on the back.

Return the hoop to the machine and stitch the second tack-down stitch. This secures both layers together.

Carefully trim away excess cork from both sides.

Adding unique text to your Halloween Fob can make it even more special.

Be sure not to cut inside the stitching lines.

Baby Lock Educator Tip

Sharp embroidery scissors make trimming easier and help prevent accidental cuts near the stitch line.

Satin Border Finish for Halloween Fob and Baby Lock Altair with Faodail Creation (Baby Lock Educator)

Follow these organized steps for a seamless Halloween Fob project completion.

After trimming, stitch the satin border.

This final stitch covers the raw edges and gives the key fob a polished appearance.

The satin stitch:

  • Secures all layers
  • Creates durability
  • Improves appearance
  • Prevents fraying

This step transforms the project from a simple embroidery piece into a professional-quality key fob.

Check off each step as you go to ensure your Halloween Fob turns out perfectly!

Baby Lock Educator Tip

Slow down embroidery speed during dense satin stitching for smoother, more consistent coverage.

Your Halloween Fob will be a memorable accessory for this festive season.

Removing Stabilizer from DIY Halloween Key Fob and Baby Lock Altair with Faodail Creation (Baby Lock Educator)

Removing Stabilizer from Halloween Key Fob and Baby Lock Altair with Faodail Creation (Baby Lock Educator)

Remove the finished fob from the hoop.

Trim away excess stabilizer while staying clear of the stitching.

Use warm water on your fingertips to dissolve the remaining stabilizer.

The stabilizer will disappear quickly, leaving behind a clean finish.

Allow the project to dry completely before installing hardware.

Baby Lock Educator Tip

Use only small amounts of water to avoid oversaturating cork materials.

Installing the Grommet on DIY Halloween Key Fob and Baby Lock Altair with Faodail Creation (Baby Lock Educator)

Create a small hole at the top of the fob.

Insert the grommet through the opening and secure it using the installation tool and hammer.

Once installed:

  • Check for secure attachment
  • Ensure smooth movement
  • Confirm proper alignment

A properly installed grommet helps your fob withstand daily use.

Baby Lock Educator Tip

Practice installing grommets on scrap material first if you’re new to hardware installation.

Final Thoughts on Halloween Fob and Baby Lock Altair with Faodail Creation (Baby Lock Educator)

Final Thoughts on Halloween Key Fob and Baby Lock Altair with Faodail Creation (Baby Lock Educator)

This DIY Halloween Key Fob and Baby Lock Altair with Faodail Creation project is a fantastic way to combine embroidery, creativity, and seasonal fun. Using IQ Designer, cork fabric, and a simple broomstick design, you can create a personalized Halloween accessory that’s both practical and stylish.

The project stitches quickly, requires minimal supplies, and makes an excellent gift or craft fair item. Best of all, the techniques you learn can be applied to countless future embroidery projects.

If you enjoyed this Halloween Fob and Baby Lock Altair with Faodail Creation tutorial, be sure to subscribe to Faodail Creation, leave a comment, and share your finished key fob creations. Your support helps the channel continue providing sewing, quilting, and embroidery tutorials for creative makers everywhere.

Frequently Asked Questions

Can I use vinyl instead of cork?

Yes. Marine vinyl and embroidery vinyl work exceptionally well for fobs.

What hoop size should I use?

A 4×4 hoop is ideal for this project.

Do I need water-soluble stabilizer?

Yes. Water-soluble stabilizer makes finishing easier and leaves clean edges.

Can beginners make this project?

Your completed Halloween Fob will be a delightful addition to your Halloween accessories.

Absolutely. This is an excellent beginner embroidery project.

Where can I get the broomstick design?

Don’t forget that your Fob can be customized and made uniquely yours!

The broomstick design is available free inside the Faodail Creation Facebook Group files section.

Read this next : Halloween Banner Baby Lock Altair Tutorial – https://faodailcreation.ca/2026/05/16/halloween-banner-baby-lock-altair-tutorial/