


Cassie Cartmell – Faodail Creation
Table of Contents
Rgis is the link to the full you tube tutorial https://youtu.be/oudDMQ8PEPo
A Foundation Paper Piecing Mini Quilt Block is one of the best ways to create tiny, accurate quilt pieces with crisp points and clean seams. If you love miniature quilts, scrap quilting, or precision piecing, this tutorial will help you confidently sew a beautiful mini quilt from start to finish.
This Foundation Paper Piecing Mini Quilt Block tutorial is beginner friendly and works wonderfully with fabric scraps, fat quarters, and small leftover quilting pieces. Foundation paper piecing allows you to create sharp corners and detailed shapes without struggling with difficult cutting measurements.
In this tutorial, you will learn:
- How to prepare a Foundation Paper Piecing Mini Quilt Block
- How to sew sections accurately
- How to trim and press miniature quilt pieces
- How to join miniature quilt rows
- How to bind a mini quilt neatly
- Helpful quilting tips for beginners
This method is especially useful for anyone who wants perfect points and accurate miniature quilt blocks without frustration.
What Is a Foundation Paper Piecing Mini Quilt Block?
A Foundation Paper Piecing Mini Quilt Block is a quilting technique where fabric pieces are sewn directly onto a printed paper pattern. The paper acts as a guide to help you sew precise shapes and tiny quilt sections accurately.
Unlike traditional piecing, foundation paper piecing helps stabilize the fabric while sewing. This makes it much easier to sew miniature quilt designs and sharp angles.
Many quilters love using a Foundation Paper Piecing Mini Quilt Block method because:
- It improves accuracy
- It creates crisp corners
- It reduces cutting mistakes
- It works perfectly for miniature quilts
- It is ideal for scrap quilting
If you struggle with half square triangles or matching tiny seams, foundation paper piecing can make quilting far easier and more enjoyable.
Materials Needed for a Foundation Paper Piecing Mini Quilt Block

Before starting your Foundation Paper Piecing Mini Quilt Block, gather the following supplies.
Fabric Supplies
You will need:
- Light pink quilting fabric
- White quilting fabric
- Scrap fabric pieces
- Fat quarter scraps
- Quilt backing fabric
- Batting
- Binding strips
Small scraps work beautifully for a Foundation Paper Piecing Mini Quilt Block because the pieces are tiny.
Sewing Supplies
Helpful sewing tools include:
- Sewing machine
- Rotary cutter
- Quilting ruler
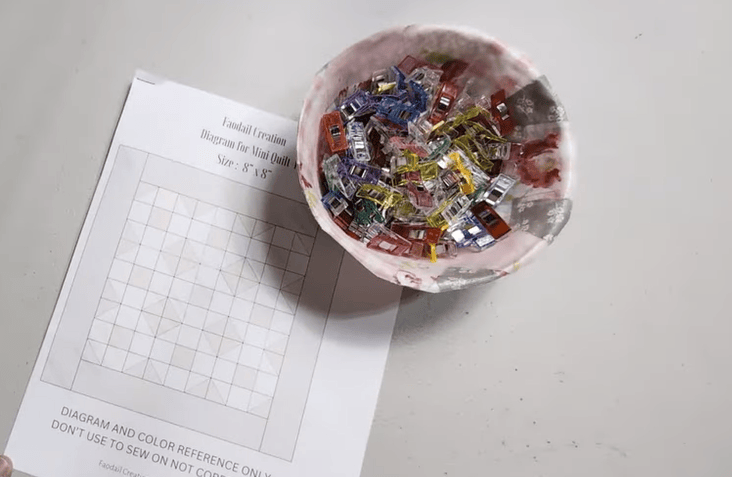
- Wonder clips
- Small roller press
- Iron
- Thread
- Paper foundation pattern
The tutorial uses a Baby Lock Soprano sewing machine with a quarter-inch quilting foot.
How to Prepare a Foundation Paper Piecing Mini Quilt Block

The first step in making a Foundation Paper Piecing Mini Quilt Block is preparing the printed templates.
You will need to print five sheets of the pattern. Each page contains two quilt sections. Since the miniature quilt requires nine blocks total, you will have one extra section available in case of mistakes.
Carefully cut around each pattern piece along the outer seam allowance lines. Do not trim directly beside the block shapes. Always leave the seam allowance intact.
Accurate cutting is important because it helps the entire Foundation Paper Piecing Mini Quilt Block fit together correctly later.
Before you begin sewing your Foundation Paper Piecing Mini Quilt Block, it is also helpful to organize your sections by labeling or stacking them in numerical order. This makes the sewing process much smoother and prevents confusion later when assembling the miniature quilt. Many quilters also like to reduce the printer paper weight by using foundation paper or lightweight copy paper because it tears away more easily after stitching.
Taking a few extra minutes to properly prepare your Foundation Paper Piecing Mini Quilt Block templates will improve accuracy and help your miniature quilt come together beautifully with cleaner seams and sharper points.
Understanding Foundation Paper Piecing Order

Follow the Numbers Carefully
When sewing a Foundation Paper Piecing Mini Quilt Block, always sew the pieces in numerical order.
For example:
- B1 connects to B2
- B2 connects to B3
- B3 connects to B4
The numbering system keeps the miniature quilt block accurate and organized.
The first fabric piece always faces upward against the back of the paper pattern. The second piece is placed face down on top of the first piece.
This step is extremely important in foundation paper piecing.
Sewing the First Foundation Paper Piecing Mini Quilt Block Section
Position the Fabric Correctly
Start your Foundation Paper Piecing Mini Quilt Block with the B1 section using light pink fabric.
Place the fabric face up behind the paper pattern so it completely covers the B1 section plus seam allowance.
Next:
- Place the white fabric face down
- Leave a quarter-inch seam allowance
- Hold the pieces securely
You can hold the pattern up to a light source to ensure the fabric fully covers the section.
Adjust Sewing Machine Settings
For tiny quilting sections, shorter stitches work best.
Helpful settings include:
- Straight stitch
- Stitch length around 1.6–1.8
- Quarter-inch foot
Shorter stitches make it easier to remove the paper later and help prevent seams from unraveling.
Sew directly along the printed line between B1 and B2.
Backstitch at the beginning and end for extra durability.
Pressing and Trimming Your Foundation Paper Piecing Mini Quilt Block

After sewing the seam:
- Trim the threads
- Flip the fabric open
- Press the seam flat
A small roller press works wonderfully for a Foundation Paper Piecing Mini Quilt Block because it saves constant trips to the ironing board.
Trim the Seam Allowance
Fold the paper pattern along the next seam line.
Using a ruler and rotary cutter:
- Trim excess fabric
- Leave a quarter-inch seam allowance
This trimming method keeps the Foundation Paper Piecing Mini Quilt Block neat and accurate.
Continue repeating the process:
- Add fabric
- Sew the seam
- Flip the fabric
- Press
- Trim
Foundation paper piecing becomes very repetitive and relaxing once you understand the process.
Completing the Foundation Paper Piecing Mini Quilt Block Sections

You will repeat the same method for:
- Section A
- Section B
- Section C
The C section is simpler because it only contains three numbered pieces.
Sewing Section C
For section C:
- C1 is white
- C2 is pink
- C3 is white
Always remember:
- First fabric faces up
- Second fabric faces down
Continue sewing directly on the printed lines.
Once complete, trim around the outer seam allowance carefully.
Now your Foundation Paper Piecing Mini Quilt Block sections are finished.
Removing the Foundation Paper

Once each Foundation Paper Piecing Mini Quilt Block section is sewn, the paper has completed its purpose.
Carefully tear away the paper backing from the stitched seams.
Short stitch lengths help the paper remove easily without damaging the quilt block.
After removing the paper:
- Press each section flat
- Avoid stretching the fabric
- Keep the miniature quilt block square
Pressing gently prevents distortion.
Take your time when removing the paper from your Foundation Paper Piecing Mini Quilt Block because pulling too quickly can loosen stitches or distort the tiny seams. Start from the outer edges and gently tear toward the stitching lines. If any paper becomes stuck in tight corners, use tweezers to carefully remove the smaller pieces without damaging your miniature quilt block.
Joining the Foundation Paper Piecing Mini Quilt Block Sections

Now it is time to assemble the miniature quilt block.
Sew the Quilt Sections Together
Place the quilt sections right sides together.
Carefully line up the seams before sewing.
Accurate seam matching is extremely important in a Foundation Paper Piecing Mini Quilt Block because even tiny mistakes become noticeable in miniature quilting.
Sew using a true quarter-inch seam allowance.
If your seam allowance is inaccurate, the entire miniature quilt may become uneven.
Press the Quilt Block
Once sewn:
- Open the block
- Press carefully
- Trim loose threads
You will need a total of nine completed miniature quilt blocks.
Arrange them into rows of three.
Sewing the Mini Quilt Rows Together

Once all nine blocks are complete:
- Sew the blocks into rows
- Press the seams
- Sew the rows together
Clips are especially helpful here because miniature quilt seams can become bulky.
A Foundation Paper Piecing Mini Quilt Block requires patience and accuracy during assembly.
If seams do not line up correctly:
- Sew slower
- Pin or clip more carefully
- Double-check seam allowances
Miniature quilting rewards precision.
Common Foundation Paper Piecing Mini Quilt Block Mistakes
Misaligned Seams
The most common issue in a Foundation Paper Piecing Mini Quilt Block is mismatched seams.
Take your time lining up intersections carefully.
Incorrect Seam Allowance
A quarter-inch seam allowance is critical.
Even slightly larger seams can distort the miniature quilt.
Fabric Too Small
Always use fabric pieces larger than necessary.
You need enough fabric to fully cover each section after flipping.
Creating the Quilt Sandwich
Once the quilt top is complete, it is time to create the quilt sandwich.
Layer the quilt as follows:
- Backing fabric facing down
- Batting in the middle
- Quilt top facing upward
Smooth all layers flat before quilting.
Before quilting your Foundation Paper Piecing Mini Quilt Block, make sure all three layers are completely smooth and wrinkle free. You can use quilting clips, safety pins, or temporary spray adhesive to keep the layers from shifting while sewing. Taking extra time to prepare the quilt sandwich properly will help prevent puckering and keep your miniature quilt laying flat and even during the quilting process.
Quilting the Foundation Paper Piecing Mini Quilt Block
For small miniature quilts, decorative stitches work beautifully.
The tutorial uses a serpentine decorative stitch instead of free-motion quilting.
Decorative stitches are excellent for beginners because they:
- Stabilize the quilt layers
- Add texture
- Simplify quilting
Mini quilts are perfect for experimenting with decorative stitches.
Binding a Foundation Paper Piecing Mini Quilt Block

Prepare the Binding
Cut binding strips no wider than 2 inches.
Fold the binding in half lengthwise and press.
Miniature quilts require smaller binding to reduce bulk.
Sew the Binding
Sew the binding around the edges of the miniature quilt.
At each corner:
- Stop sewing
- Fold the binding upward
- Fold it back down
- Continue sewing
This creates neat mitered corners.
Binding a Foundation Paper Piecing Mini Quilt Block can feel fiddly at first, but it becomes easier with practice.
Joining the Binding Ends
Joining tiny binding ends neatly can be challenging.
To connect them:
- Open the binding strips
- Place them right sides together
- Draw a diagonal line
- Sew across the line
- Trim excess fabric
This creates a clean professional finish.
Hand Stitching the Binding
For miniature quilts, hand stitching often gives the cleanest finish.
Machine stitching the back can sometimes show through the front of the quilt.
Hand stitching keeps the binding neat and nearly invisible.
Clip the binding carefully around the edges before stitching.
Why Quilters Love Foundation Paper Piecing Mini Quilt Block Projects

There are many reasons quilters enjoy creating a Foundation Paper Piecing Mini Quilt Block.
Excellent for Scrap Fabric
Tiny pieces make perfect use of leftover quilting scraps.
Great for Precision
Foundation paper piecing creates sharp points and accurate seams.
Perfect for Beginners
Even beginner quilters can achieve professional-looking results with this technique.
Wonderful for Miniature Quilts
Mini quilts become much easier when using foundation paper piecing methods.
Final Thoughts on Foundation Paper Piecing Mini Quilt Block Projects
This Foundation Paper Piecing Mini Quilt Block tutorial is a fantastic way to improve quilting accuracy while creating an adorable miniature quilt.
By following the numbered sections carefully, trimming accurately, and sewing slowly, you can create beautiful mini quilt blocks with crisp points and clean seams.
Foundation paper piecing may seem intimidating at first, but once you complete your first Foundation Paper Piecing Mini Quilt Block, the process becomes much easier and incredibly enjoyable.
Miniature quilting is rewarding, creative, and a wonderful way to use your fabric scraps beautifully.
Whether you are a beginner quilter or experienced sewist, this project is a fun and satisfying quilting tutorial to try.
- How to Embroider Fabric Labels – A Fun and Easy Sewing Project
- How to Free Motion Quilt Half Square Triangles – Easy Ruler Work Tutorial
- How to Applique – Daisy Lap Quilt – A Beautiful Beginner-Friendly Quilt
- How to Sew a Lattice Quilt Border – An Easy and Stunning Quilt Border Tutorial
- How to Applique – FREE Acorn Applique Sewing Pattern for Beginners
If you enjoyed this you will like this too : Foundation Paper Piecing Mini Quilt Block – Amazing Easy Step-by-Step Tutorial for a Stunning Mini Quilt https://faodailcreation.ca/2026/05/22/foundation-paper-piecing-mini-quilt-block/
